
TL;DR:
- Texas flat roofs face unique challenges from extreme heat and heavy storms, making waterproofing essential.
- Proper inspection, surface prep, and sealant application are crucial for effective waterproofing and long-lasting protection.
- Regular maintenance and timely repairs prevent small issues from causing major, costly roof failures.
Texas weather does not give flat roofs a break. Between scorching summer heat, sudden downpours, and hurricane-season storms, your flat roof faces more stress than most homeowners realize. A single undetected leak can quietly rot structural beams, feed mold growth, and turn a small repair into a full replacement. The good news is that waterproofing your flat roof is something you can plan for, execute correctly, and maintain over time. This guide walks you through every stage, from understanding why Texas conditions are uniquely harsh to verifying your work after the job is done.
Table of Contents
- Why waterproofing flat roofs matters in Texas
- What you need: Tools, materials, and safety checklist
- Step-by-step guide: Waterproofing your flat roof
- How to verify and maintain waterproofing
- The overlooked truth: Why most Texas flat roofs fail
- Get professional help for lasting protection
- Frequently asked questions
Key Takeaways
| Point | Details |
|---|---|
| Waterproofing is critical | Without effective waterproofing, flat roofs are vulnerable to major water damage in Texas storms. |
| Choose the right material | Using TPO, bitumen, or acrylic coatings boosts durability and weather resistance. |
| Maintenance prevents failure | Seasonal checks and prompt repairs help flat roof waterproofing last for years. |
| DIY or professional options | Homeowners can handle basic waterproofing, but professionals are best for large or complex jobs. |
Why waterproofing flat roofs matters in Texas
Flat roofs look simple, but they carry a hidden disadvantage: water has nowhere to go quickly. On a pitched roof, rain runs off fast. On a flat roof, even a slight drainage problem lets water pool and sit. In Texas, that problem gets amplified by the climate in ways that homeowners in other states simply do not face.
Texas summers push temperatures above 100°F regularly, which causes roofing materials to expand, crack, and age faster than the manufacturer’s rating suggests. Then storm season arrives, dumping inches of rain in hours. That cycle of extreme heat followed by sudden heavy rain is one of the most damaging patterns a flat roof can experience. Flat roofs in Texas are prone to leaks due to heavy rains and intense sun exposure, making waterproofing a necessity rather than an optional upgrade.
The most common sources of water intrusion on flat roofs include:
- Cracked or blistered membrane surfaces from UV exposure
- Pooling water around drains and low spots
- Failed flashing at roof edges, vents, and HVAC units
- Seam separations in older membrane systems
- Debris buildup blocking proper drainage
The consequences of ignoring these entry points are serious. Water that gets under your roofing system does not stay there. It migrates into insulation, soaks into decking, and eventually reaches your interior walls and ceilings. Without regular maintenance, water damage and structural problems can occur, and by the time you see a stain on your ceiling, the damage above it is already significant.
Texas also has a compressed window for safe roof work. Summers are too hot for many sealants to cure properly, and storm season can arrive with little warning. Addressing common roofing problems before spring storms hit gives you the best conditions for waterproofing to bond and perform.
The real cost of waiting: A small leak that costs a few hundred dollars to seal today can escalate into thousands of dollars in structural repairs within a single storm season. Timing matters more than most homeowners expect.
Understanding commercial roof problems in Texas also helps residential homeowners, since flat roofs on homes share many of the same failure points as commercial buildings.
What you need: Tools, materials, and safety checklist
Before you climb up on that roof, you need the right gear. Rushing into a waterproofing job without proper materials is one of the fastest ways to waste money and end up with a roof that fails in the next rainstorm.
Essential tools and materials:
- Waterproofing membrane rolls or liquid-applied coating
- Roofing sealant and caulk gun
- Stiff-bristle brush and paint rollers with extension handles
- Roofing primer (required for most membrane systems)
- Utility knife and patching fabric for cracks
- Broom and leaf blower for surface prep
Personal safety gear:
- Non-slip rubber-soled shoes
- Safety gloves and eye protection
- Sunscreen and a hat (Texas sun is brutal on a reflective roof)
- A spotter or partner on the ground
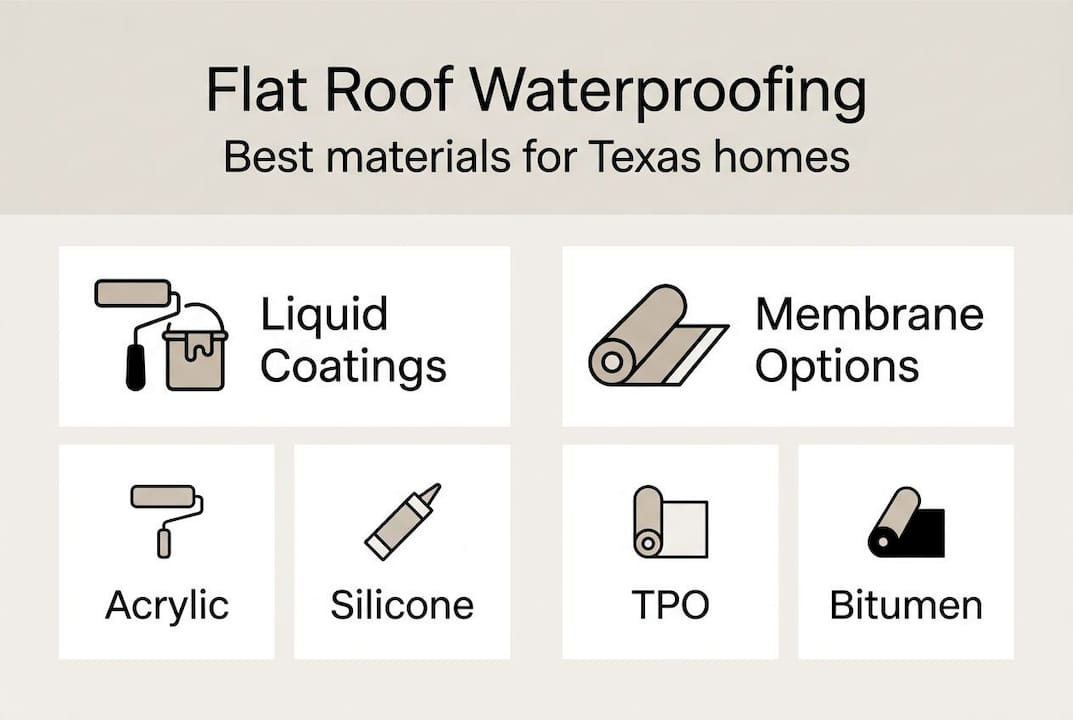
Different waterproofing materials offer various advantages and durability records, so choosing the right one for your specific roof matters.
| Material | Best for | Lifespan | Heat resistance |
|---|---|---|---|
| TPO membrane | New installs, large roofs | 15-25 years | Excellent |
| Modified bitumen | Older roofs, patches | 10-20 years | Good |
| Acrylic coating | Existing membranes, DIY | 5-10 years | Good |
| Silicone coating | Ponding water areas | 10-15 years | Excellent |
For most Texas homeowners doing a DIY waterproofing project, acrylic or silicone liquid-applied coatings are the most practical starting point. They apply like thick paint, require no special equipment, and bond well to existing surfaces. If your roof has significant damage or you are working with durable flat roof materials like TPO, professional installation is the smarter call.
Pro Tip: Never apply waterproofing coatings when rain is forecast within 24 hours or when surface temperatures exceed 90°F. Both conditions prevent proper curing and can cause the coating to peel within weeks.
Safety checklist before you start:
- [ ] Check weather forecast for a 48-hour dry window
- [ ] Inspect the roof for soft spots before walking on it
- [ ] Secure your ladder on level ground
- [ ] Tell someone you are working on the roof
- [ ] Have water and shade breaks planned
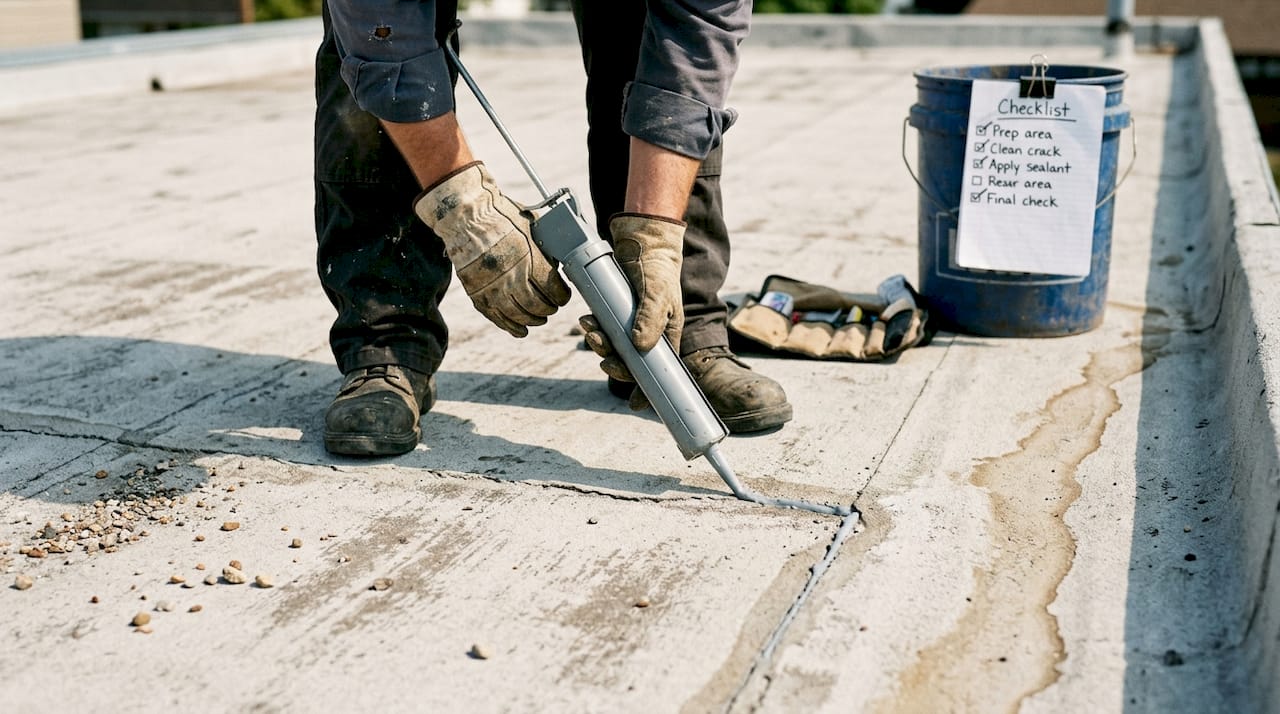
Step-by-step guide: Waterproofing your flat roof
With your materials ready and safety gear on, here is how to waterproof your flat roof the right way. Homeowners can apply waterproof coatings and membranes with proper guidance, but the prep work is just as important as the application itself.
Step 1: Inspect the entire surface
Walk the roof slowly and mark every crack, blister, seam separation, and low spot with chalk. Pay close attention to flashing around vents, skylights, and edges. These are the areas where water most often finds its way in.
Step 2: Clean the surface thoroughly
Sweep off all debris, then use a pressure washer or stiff brush with a mild detergent to remove dirt, algae, and loose material. Let the surface dry completely before moving on. Any moisture trapped under a coating will cause bubbling and failure.
Step 3: Repair cracks and holes
Apply roofing caulk to small cracks and let it cure. For larger gaps or damaged sections, cut a piece of patching fabric, embed it in roofing cement, and smooth it flat. This step is non-negotiable. Coating over unrepaired damage just seals the problem in temporarily.
Step 4: Apply primer
Most membrane and coating systems require a primer coat to ensure adhesion. Roll it on evenly and allow it to dry per the manufacturer’s instructions, usually 1-2 hours in Texas heat.
Step 5: Apply the waterproofing membrane or coating
For liquid coatings, use a roller to apply an even first coat, working from the far edge toward your exit point. Apply a second coat perpendicular to the first after the recommended drying time. For flat roofing options like rolled membranes, overlap seams by at least 3 inches and press firmly to eliminate air pockets.
Step 6: Seal all edges and penetrations
Use roofing sealant around every vent, drain, and edge flashing. These spots get skipped most often and are the first to leak.
Pro Tip: Apply an extra third coat at seams and around penetrations. These high-stress zones need more material than the flat field areas of the roof.
| Application method | Difficulty | Best for | Drying time |
|---|---|---|---|
| Liquid coating | Easy | DIY, small roofs | 4-8 hours per coat |
| Rolled membrane | Moderate | Medium roofs | 24-48 hours |
| Heat-welded TPO | Professional | Large or new roofs | Immediate |
For a detailed roof repair step-by-step process, reviewing additional guidance before starting your project is always a smart move.
How to verify and maintain waterproofing
Finishing the application is not the finish line. Verifying that your waterproofing actually works and keeping it in shape over time is what separates a roof that lasts from one that fails in the next storm.
How to test your waterproofing:
- Run a garden hose over the surface for 15-20 minutes and check the interior ceiling for any moisture
- Look for standing water after the hose test, which signals drainage issues
- Press firmly on the coated surface to check for soft spots or bubbling
- Inspect all seams and edges for lifting or separation
Regular inspections and maintenance can extend the life of a flat roof by years, and the effort required is minimal compared to the cost of a premature replacement.
What to look for after storms:
- New water stains on interior ceilings or walls
- Debris accumulation blocking drains
- Visible tears or punctures in the membrane
- Flashing that has lifted or pulled away from the wall
Pro Tip: Do your post-storm inspection within 48 hours of a major weather event. Small problems spotted early can be sealed with a tube of caulk. The same problem left for weeks may require a full section replacement.
Seasonal maintenance schedule:
- Spring: Full inspection before storm season. Clear drains, check seams, reseal any cracked flashing.
- Summer: Mid-season check after the first major heat wave. Look for new blistering.
- Fall: Clear leaves and debris. Inspect for any damage from summer storms.
- Winter: Check for standing water after cold fronts bring heavy rain.
Using a dedicated roof inspection guide helps you stay consistent and catch problems before they grow. If you notice widespread coating failure, seam separation across large areas, or recurring leaks despite repairs, it is time to call a professional rather than keep patching.
The overlooked truth: Why most Texas flat roofs fail
Here is something we have seen repeatedly in this industry: most flat roofs in Texas do not fail because of one catastrophic storm. They fail because of a dozen small problems that were each easy to fix and were each ignored.
A tiny seam gap gets a little bigger every summer. A slow drain sits with pooled water after every rain. Flashing that needs one tube of caulk goes untouched for two years. None of these feel urgent. Together, they quietly destroy a roof that should have lasted another decade.
Ignoring minor roof issues often leads to major future repairs, and that pattern plays out on residential flat roofs just as often as commercial ones.
The homeowners who get the most out of their flat roofs are not the ones who spend the most money. They are the ones who treat their roof like a car. They check it regularly, fix small things immediately, and make informed choices about materials when it is time to upgrade. Thinking about smart flat roof design from the start, including proper drainage slope and quality membranes, prevents most of the problems that lead to early failure.
Waterproofing is not a one-time event. It is a habit.
Get professional help for lasting protection
DIY waterproofing works well for routine maintenance and small repairs. But some jobs are bigger than a roller and a bucket of coating can handle.
If your flat roof has widespread membrane failure, persistent leaks despite multiple repairs, or is simply aging past its useful life, professional replacement is the smarter investment. The Mister ReRoof team specializes in flat roof replacement in El Campo and the greater Houston area, using proven systems built for Texas conditions. If your roof needs a TPO upgrade, our TPO roof experts can assess your situation and deliver a solution that lasts. Contact Mister ReRoof today for a free estimate and local expertise you can trust.
Frequently asked questions
How often should I waterproof my flat roof in Texas?
You should reapply waterproofing every 2-5 years, or after major storms. Flat roof maintenance done on a regular schedule extends roof life and prevents costly leaks.
What’s the best waterproofing material for Texas flat roofs?
TPO, modified bitumen, and acrylic coatings are popular because of their heat and weather resistance. Different materials have various advantages depending on your roof size, age, and budget.
How do I know if my flat roof needs waterproofing?
Look for standing water, visible cracks, or interior leaks after rain. These are clear signs your waterproofing has failed. A flat roof inspection can confirm the extent of the damage.
Can I waterproof my flat roof myself, or should I call a professional?
Small roofs and routine recoating are manageable DIY projects with the right materials. For large areas or significant damage, professional application ensures proper adhesion and long-term performance.
What maintenance should I do post-waterproofing?
Check for new leaks after every major storm, clear debris from drains, and inspect all seams and flashing each season. Staying consistent with flat roof upkeep is the single best way to protect your investment.