
TL;DR:
- Do not climb your roof if it is wet, icy, or steep to avoid injury and liability.
- Use ground-based tools and attic checks to safely document storm damage.
- Call a professional if damage exceeds 30-50% or if unsafe conditions are present.
After a major Texas storm, the urge to climb up and check your roof immediately is understandable. But acting fast without a plan can get you hurt, cost you money, or even damage your insurance claim. Texas sees some of the most severe weather in the country, from hail the size of golf balls to hurricane-force winds, and every storm leaves behind a narrow window to document and report damage correctly. This guide walks you through how to inspect your roof safely, what to document, when to make temporary repairs, and exactly when to call a professional instead of going it alone.
Table of Contents
- Safety first: When not to climb your roof
- What you need: Tools, materials, and documentation essentials
- Step-by-step: Inspecting your roof safely from the ground and attic
- Temporary repairs and when to call a professional
- Mandatory inspections for Texas coastal and windstorm policies
- Perspective: Why DIY roof checks are good, but not enough
- Need a pro? Trusted roof inspection and repair in Texas
- Frequently asked questions
Key Takeaways
| Point | Details |
|---|---|
| Safety before inspection | Never climb roofs in unsafe conditions; use ground-level checks and call a pro if needed. |
| Document thoroughly | Photos, videos, and receipts are essential for successful insurance claims. |
| Limit DIY repairs | Make only temporary repairs and never before documenting the damage for your adjuster. |
| Know when to call pros | Extensive, older, or coastal roof damage requires a certified inspector or contractor. |
Safety first: When not to climb your roof
The instinct to get up on your roof and look around is one of the most common mistakes homeowners make after a storm. The roof surface may look fine from the ground but be slippery, structurally weakened, or hiding soft spots that can give way under your weight. A fall from even a single-story roof causes serious injury.
The Texas Department of Insurance is clear: do not climb your roof if it has a steep pitch over 6/12, if it is wet, icy, or windy, if you lack proper safety gear, if the structure seems weakened, or if you have no roofing experience. Beyond the physical risk, an injury during an unauthorized DIY inspection can create liability complications with your homeowner’s insurance.
Conditions that mean you should stay off the roof:
- Wet or damp shingles after rain
- Wind gusts still present
- Visible sagging or soft areas
- No non-slip footwear or safety harness
- Roof pitch steeper than a 6/12 slope
- You have never walked a roof before
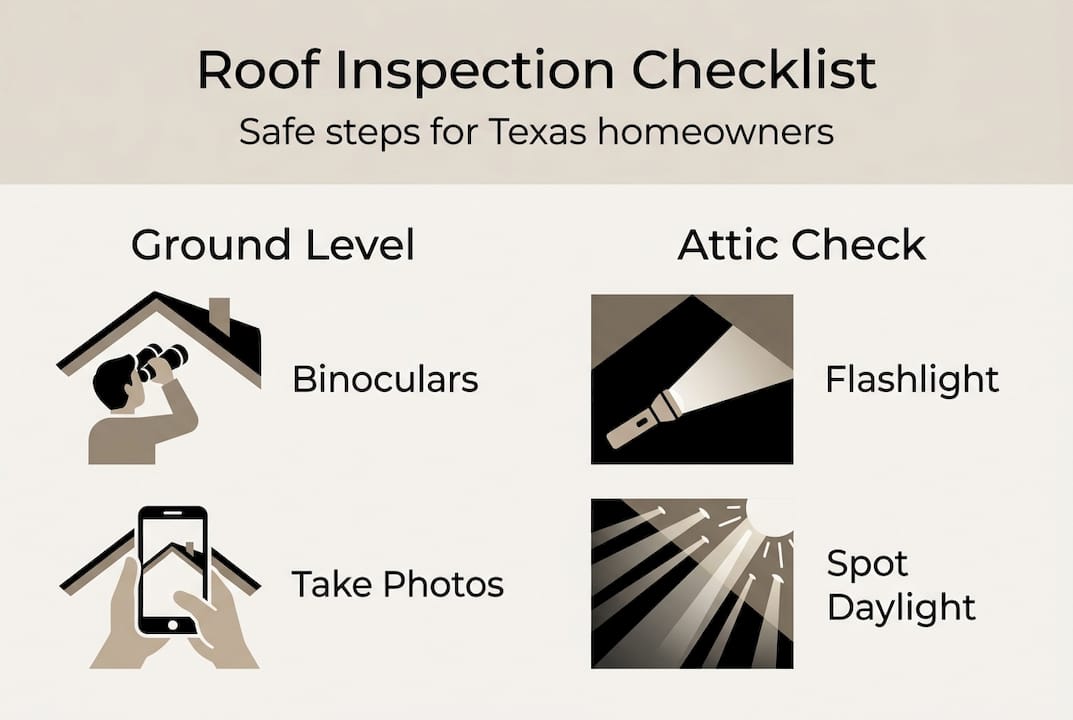
The good news is you can gather a surprising amount of useful information without ever leaving the ground. Grab a pair of binoculars and walk the perimeter of your home slowly. Use your smartphone’s zoom function to photograph specific areas of concern. Video is especially useful because you can review it frame by frame later.
| Method | What it reveals | Risk level |
|---|---|---|
| Binoculars from ground | Missing shingles, visible damage | None |
| Smartphone zoom/video | Close-up of flashing, gutters | None |
| Attic interior check | Leaks, stains, daylight gaps | Very low |
| Neighbor comparison | Storm pattern, widespread damage | None |
| Professional drone | Full roof surface, hidden damage | None |
Professional roofers increasingly use drones and infrared cameras to find damage that is invisible from the ground or even from walking the roof. For flat roof inspection safety, the risks are different but just as real, since flat roofs can hold standing water that hides structural weakness.
Pro Tip: Record a slow, steady video walking around your entire home right after a storm. Narrate what you see out loud. This timestamped footage becomes powerful evidence for your insurance adjuster and takes less than ten minutes.
What you need: Tools, materials, and documentation essentials
Before you start any inspection, gather the right tools. Going in unprepared means you will miss things, document poorly, or have to repeat the whole process. Think of this as your pre-inspection kit.
Essential tools for a safe roof inspection:
- Smartphone with video capability (charged and ready)
- Binoculars for ground-level viewing
- Flashlight for attic inspection
- Notepad or voice memo app for observations
- Sturdy, non-slip shoes if accessing safe low areas
- Work gloves for handling debris
| Item | Purpose | Why it matters |
|---|---|---|
| Smartphone/camera | Photo and video documentation | Dated evidence for insurance |
| Binoculars | Ground-level detail view | Avoids unsafe climbing |
| Flashlight | Attic leak and stain check | Finds hidden water damage |
| Notepad | Record observations and locations | Supports written claim |
| Gloves | Handle debris safely | Prevents cuts from metal or glass |
| Sturdy shoes | Traction on wet surfaces | Reduces slip risk |
Documentation is the part most homeowners underestimate. Dated photos and videos from multiple angles, including damage to nearby cars, fences, and landscaping, are essential for a successful insurance claim. That dented car in your driveway is actually evidence that hail hit your roof too.
For a thorough approach, follow a hail damage checklist specific to Texas weather patterns. And before you file anything, review insurance roof claim tips so you understand what your adjuster will be looking for.
Pro Tip: Create a dedicated folder on your phone labeled with the storm date. Drop every photo, video, and receipt into it immediately. When your adjuster calls, you will have everything organized and ready to share in seconds.
Step-by-step: Inspecting your roof safely from the ground and attic
Now that you have your tools and safety guidelines clear, here is how to actually do the inspection. Work through this in order and do not skip the attic step. Many homeowners focus entirely on the exterior and miss the clearest signs of damage hiding right above their ceilings.
Ground-level inspection steps:
- Walk the full perimeter of your home and photograph every roof plane from multiple angles.
- Look for missing, curled, or cracked shingles using binoculars.
- Check gutters and downspouts for granule buildup, which signals shingle wear from hail impact.
- Inspect flashing around chimneys, vents, and skylights for lifted or bent metal.
- Note any debris on the roof such as tree branches or foreign objects.
- Check for dents on metal components like vents, gutters, and AC units as hail evidence.
Signs of specific storm damage to watch for:
- Hail: circular dents, granule loss, soft spots on asphalt shingles
- Wind: lifted shingle edges, missing sections, displaced ridge caps
- Impact: cracked or broken shingles, punctures, displaced flashing
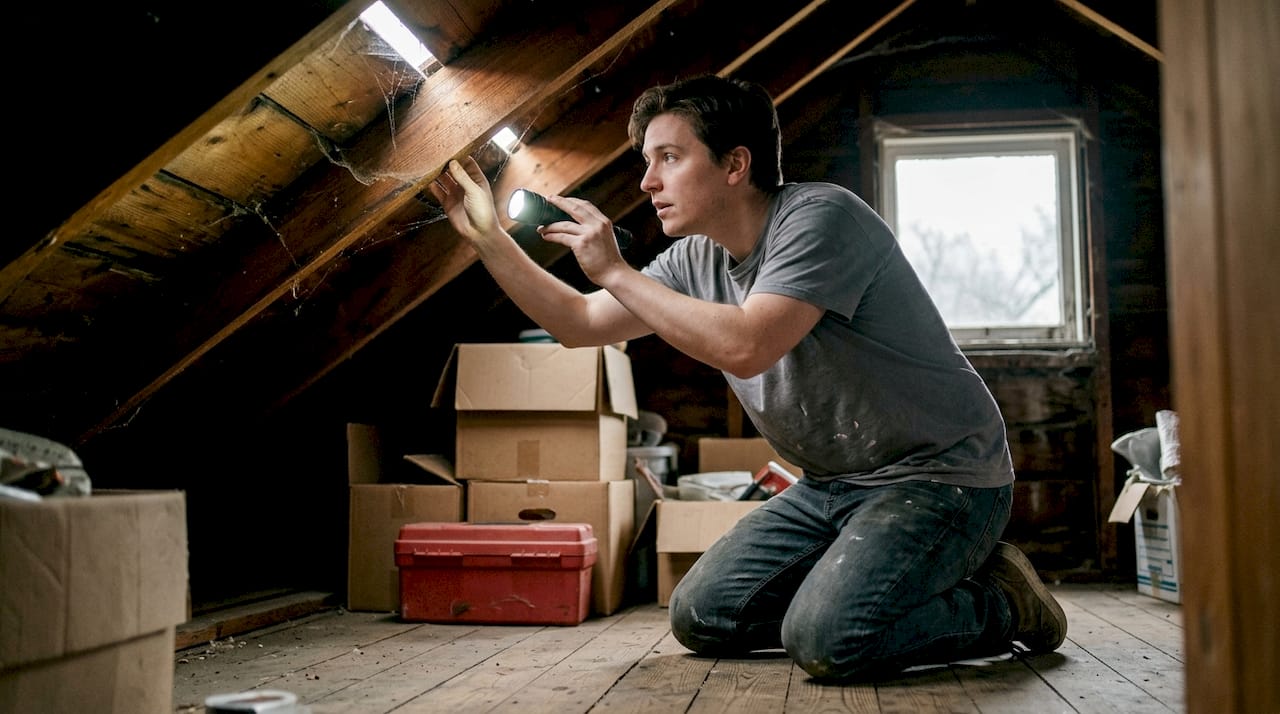
Once you finish outside, head to your attic with a flashlight. Turn off the light and look for any daylight coming through the decking. Check the underside of the roof boards for water stains, dark streaks, or active drips. Mold or mildew smell is a red flag that water has been entering for some time.
DIY inspection is limited to what you can see from the ground and attic. A licensed roofer can identify damage that is invisible to the untrained eye, and their written report carries weight with insurance adjusters. Also, avoid any contractor who shows up unsolicited after a storm, a practice the Texas Department of Insurance warns against.
If you spot active leaks, the priority shifts immediately. Learn how to stop roof leaks fast before water damages your ceilings and walls. For a broader view of what comes next, the full storm damage repair steps walk you through the entire process from inspection to final repair.
Pro Tip: Check local news and neighborhood apps after a storm. If your area is confirmed to have received large hail or high winds, that public record can support your insurance claim even before a professional inspection.
Temporary repairs and when to call a professional
Your inspection is done and you have found damage. Now what? The first priority is stopping further damage from entering your home, but you need to do it carefully to protect your insurance claim.
Important: The Texas Department of Insurance recommends temporary repairs to prevent additional damage, such as tarping holes or removing standing water, and keeping all receipts. Do not make permanent repairs before your insurance adjuster has inspected the damage. Permanent fixes done too soon can reduce or void your payout.
Safe temporary repairs you can make:
- Tarp over holes or missing shingle sections
- Remove debris from the roof surface if safely accessible
- Place buckets under active interior drips
- Clear clogged gutters to prevent water backup
- Cover broken skylights with plywood or plastic sheeting
When to call a professional immediately:
- You see sagging anywhere on the roof surface or decking.
- There are active leaks that tarping has not stopped.
- Damage covers more than 30 to 50 percent of the roof area.
- Your roof is 15 or more years old and took a direct hit.
- You are in a coastal windstorm zone with a TWIA policy.
- You feel unsafe at any point during your own inspection.
For widespread damage situations, especially hail bruising across the full roof, granule loss, or visible sagging, a professional assessment is not optional. It is the difference between a full insurance payout and a partial one. Detailed roof inspections in Texas by licensed contractors also carry legal weight if your claim is disputed.
Mandatory inspections for Texas coastal and windstorm policies
If you live in a Texas coastal county and carry windstorm insurance through the Texas Windstorm Insurance Association (TWIA), the rules are different and stricter. Coastal windstorm inspections are mandatory for insurance eligibility, and skipping them can disqualify your claim entirely.
Key requirements for coastal Texas homeowners:
- Repairs over 100 square feet require a WPI-8 certificate from a TDI-approved inspector or engineer.
- You must use a TDI-approved inspector, not just any licensed roofer.
- Inspections must happen before the work is covered up or finished.
- DIY repairs in coastal zones do not qualify for TWIA coverage without proper inspection.
Understanding the full scope of windstorm roof inspection rules before you start any work protects your coverage. Staying current on roof maintenance tips for Texas conditions also helps you avoid situations where deferred maintenance becomes a claim denial reason.
Perspective: Why DIY roof checks are good, but not enough
We encourage every homeowner to do a ground-level and attic check after a storm. Catching a problem early prevents a small leak from becoming a destroyed ceiling. That part of DIY inspection is genuinely valuable and we mean that.
But here is the honest truth we have seen play out repeatedly: homeowners who rely only on their own inspection often leave money on the table. Hidden hail bruising on shingles looks like nothing from the ground. Damaged underlayment does not show up until water is already inside your walls. Insurance adjusters are trained to minimize payouts, and without a professional written report backing your claim, you may accept a settlement that does not cover the full storm repair process.
The cost of a professional inspection is almost always recovered through a more accurate insurance payout. Do what you can safely from the ground. Document everything. Then call a licensed roofer before you finalize anything with your insurance company. Do not try to do it all yourself.
Need a pro? Trusted roof inspection and repair in Texas
If your inspection has turned up damage you are not comfortable handling alone, or if your insurance claim needs professional documentation, Mister ReRoof is ready to help.
We serve homeowners across El Campo, Houston, and surrounding Texas communities with expert roof replacement and repair services. Whether you need a metal roof replacement in Victoria built to handle coastal weather, a shingle roof replacement in Hallettsville, or a full damage assessment after a major storm, our team delivers honest evaluations and durable solutions. Schedule your inspection today and get a free estimate. We will tell you exactly what your roof needs and back it up in writing.
Frequently asked questions
How can I safely inspect my roof after a Texas storm?
Stay on the ground and use binoculars or your phone camera, and check your attic for leaks or stains instead of climbing. Climbing is unsafe without experience, proper gear, and stable conditions.
What should I document for a roof damage insurance claim?
Take dated photos and videos from several angles and include damage to nearby cars or fences for context. Thorough documentation from multiple angles is essential for a successful claim.
When is it necessary to hire a roofing professional?
Hire a pro if over 30 to 50 percent of your roof is damaged, if you see sagging or active leaks, or if your roof is over 15 years old. Extensive damage always warrants a licensed assessment.
Are special inspections required for coastal Texas homes?
Yes, coastal Texas homes with windstorm insurance need a TDI-approved inspection for major repairs or claims. Windstorm inspections are mandatory for TWIA insurance eligibility.
Can I make repairs before the insurance adjuster visits?
Only make temporary repairs to prevent further damage and keep all receipts. Wait for your adjuster before making any permanent fixes to protect your full payout.