
Houston homeowners know how quickly severe storms can leave roofs battered and vulnerable. When water starts seeping in or shingles go missing, hesitation risks costly interior damage and even structural threats. Addressing roof emergencies immediately and safely matters because acting fast helps prevent escalation. This guide walks you through the most critical roof safety and emergency repair tactics, giving you step-by-step solutions to restore protection and peace of mind after a storm hits.
Table of Contents
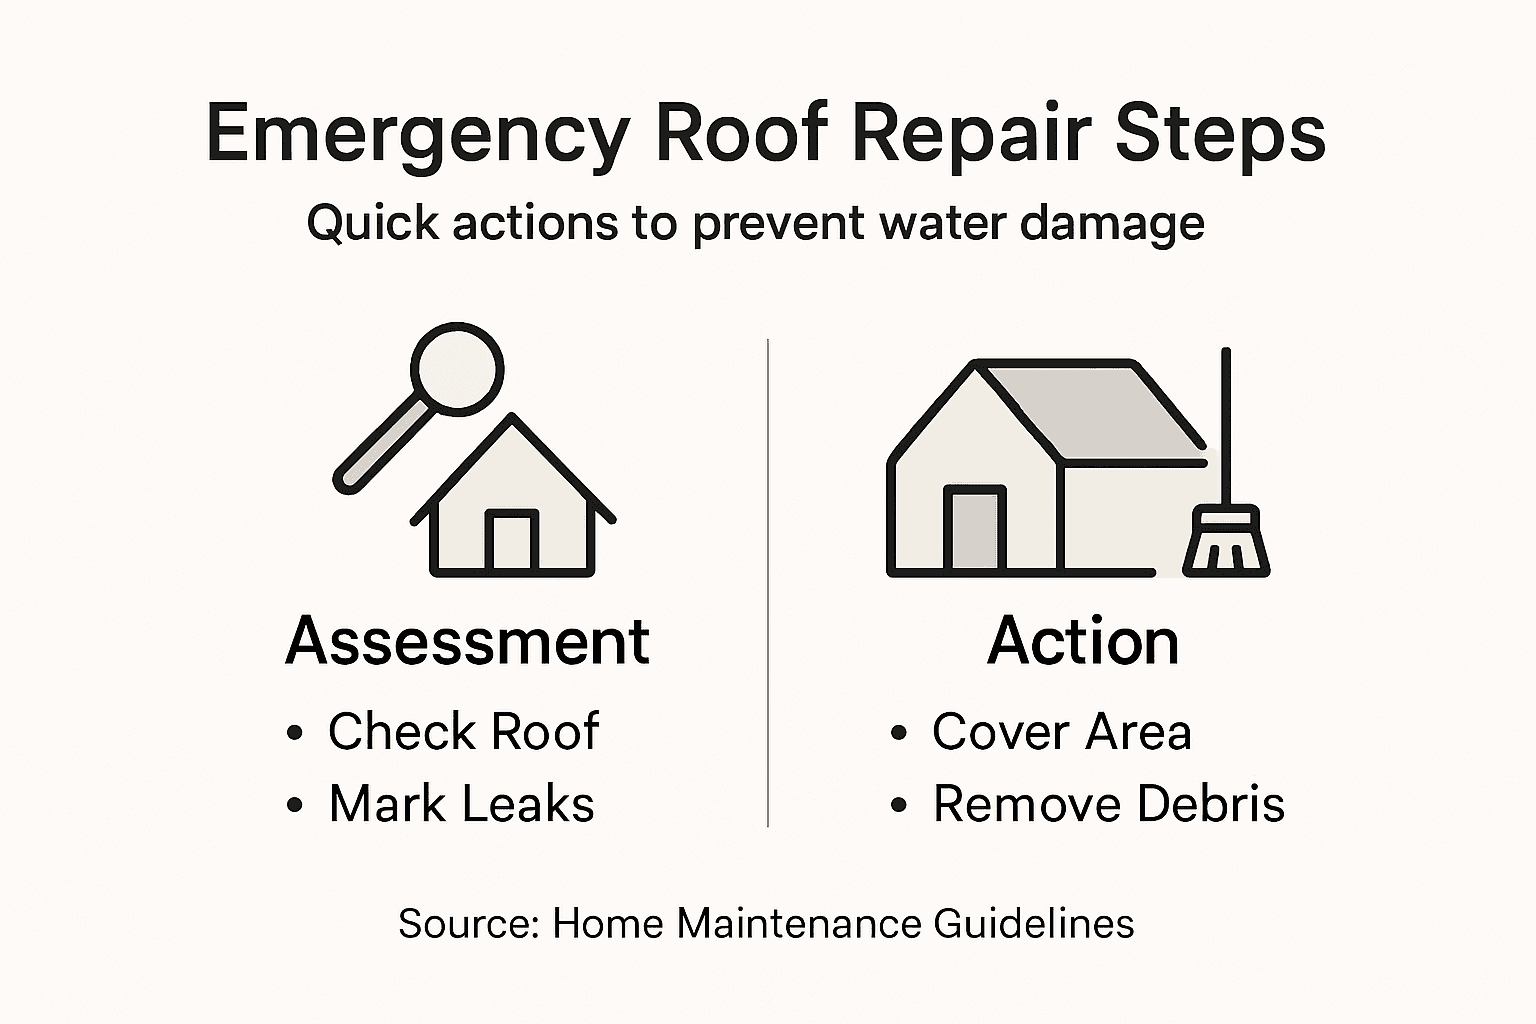
- Step 1: Assess Damage And Ensure Roof Safety
- Step 2: Gather Emergency Roof Repair Materials
- Step 3: Contain Leaks With Temporary Coverings
- Step 4: Secure Damaged Areas And Clear Debris
- Step 5: Inspect And Confirm Leak Protection
Important Summary
| Significant Message | Explanation |
|---|---|
| 1. Assess Your Roof Carefully | Examine your roof for damage using binoculars or safely from the ground before attempting repairs or contacting professionals. |
| 2. Gather Essential Repair Materials | Stock up on waterproof tarps, roofing cement, and fasteners to prevent water intrusion before a storm hits. |
| 3. Apply Temporary Coverings Effectively | Use tarps and patches to redirect water away from leaks, ensuring they are securely fastened against wind and rain. |
| 4. Clear Debris and Stabilize Areas | Remove loose materials from your roof and secure any damaged areas to prevent further deterioration and enhance safety. |
| 5. Inspect Repairs Regularly | Continuously check your temporary repairs, especially after rain, to ensure they are effective and catch any new leaks early. |
Step 1: Assess Damage and Ensure Roof Safety
Before you even think about climbing onto your roof or calling a contractor, you need to understand what you’re dealing with. Assessing your roof damage accurately tells you whether this is a situation you can handle temporarily yourself or if you need immediate professional help. This step protects you from making the damage worse and keeps you safe while you evaluate what happened.
Start by examining your roof from the ground using binoculars or a ladder positioned safely against the side of your house. Look for visible signs of damage like missing shingles, cracked tiles, dented metal panels, or areas where the roof covering has separated from the underlying structure. In Houston’s storm season, wind often lifts shingles from one edge, creating gaps where water can sneak in. Write down what you see and note which sections of your roof show damage. Pay special attention to the roof sections facing the direction the storm came from, as these typically take the worst beating. If you can see into your attic, check for water stains on the underside of the roof deck or on insulation, as these reveal active leak locations even if the exterior damage isn’t obvious.
Safety comes next. If your roof sustained major structural damage, missing large sections, or has visible sagging, stay off it completely. A compromised roof can collapse under your weight. According to systematic roof damage assessment methods, you should evaluate structural integrity before attempting any repairs or inspection work. Look for signs of structural failure like cracks in the roof decking visible from below, beams that appear bent or twisted, or sections of roof that hang lower than others. If you see any of these warning signs, contact a professional immediately. Document everything with photos and video, as you’ll need this evidence for insurance claims. Take pictures from multiple angles showing the overall damage and close-ups of specific problem areas.
Check your interior spaces next. Go into your attic and upper rooms during daylight to spot water coming through. Mark these locations with tape or a marker so you remember where the water is entering. Moisture in your insulation, staining on ceiling materials, or that telltale musty smell all point to active leaks. This information helps contractors pinpoint problems quickly and prevents you from missing secondary damage. In Houston’s humidity, mold can begin growing within 24 to 48 hours after water intrusion starts, so speed matters here.
Once you’ve documented the damage and confirmed your roof is structurally sound enough to work on, you can move forward with temporary repairs or professional solutions. Understanding the scope and severity of your damage guides every decision that comes next.
Pro tip: Take dated photos and video of all damage immediately after the storm, even before you assess repairs, as insurance adjusters use this documentation to process claims faster and approve coverage more reliably.
Step 2: Gather Emergency Roof Repair Materials
With your damage assessment complete, you need to gather the right materials to stop water intrusion quickly. Having these items on hand before a storm hits is ideal, but if you’re already dealing with an active leak, getting them together now prevents the situation from getting worse. The good news is that most emergency roof repair materials are affordable and available at any hardware store in Houston.
Your first priority is a waterproof barrier. A heavy-duty plastic tarp or reinforced roof patch fabric acts as your temporary shield against rain. Tarps work well for covering large damaged areas, while roofing fabric and wet and dry roofing cement are better for patching specific holes or gaps. You’ll need roofing nails or fasteners to secure tarps in place, along with a hammer or power drill depending on your roof type. If your roof has metal panels, you might need metal fasteners specifically designed for that material. For asphalt shingles and flat roofs, standard roofing nails work fine. Don’t cheap out here because a tarp that blows away in the next gust of wind defeats the purpose. Grab heavy duty options rated for outdoor use and secured with stainless steel fasteners that won’t rust out in Houston’s humid climate.
Next, assemble your adhesive and sealant supplies. Waterproof roofing cement or sealant creates a watertight bond between patches and existing roof materials. Keep in mind that different roof types require compatible materials. Metal roofs need different sealants than asphalt shingles, and flat roofs have their own requirements. Check what your roof is made of before buying sealant. You’ll also want roofing membrane or synthetic underlayment for more substantial repairs. These materials sit under the top layer of your roof and provide backup protection if water gets past the primary barrier. Having reinforced membranes and synthetic underlayments on hand means you can make repairs that actually last until a contractor arrives, rather than just buying time.
Here’s a quick comparison of roof types and their emergency repair needs:
| Roof Type | Common Storm Damage | Best Temporary Materials |
|---|---|---|
| Asphalt Shingle | Missing, lifted shingles | Plastic tarp, roofing nails |
| Metal Panel | Dented, lifted panels | Metal fasteners, sealant |
| Flat (TPO/EPDM) | Torn membrane, pooling | Roofing cement, fabric patch |
| Tile (Clay/Concrete) | Cracked or missing tiles | Plastic tarp, tile adhesive |
Stock basic tools alongside your materials. A utility knife or roofing knife cuts patches to size and clears away debris. Work gloves protect your hands from sharp edges and irritating materials. A putty knife or spreader applies sealant smoothly. Safety equipment matters too. Buy a proper roof harness and rope if you’ll be working at height, along with sturdy shoes with good grip. Goggles protect your eyes from splashing sealant or flying debris, and a dust mask prevents you from inhaling harmful particles. A flashlight helps you see into dark attic spaces and work safely if storm clouds are moving in.
If you’re dealing with a flat roof situation, understanding flat roof repair procedures specific to Houston helps you select exactly the right materials for your system. Don’t just grab whatever is on the shelf. Spend five minutes identifying your roof type, then match your materials accordingly. A sealant that works perfectly on a sloped shingle roof might fail completely on a flat TPO system.
Store your emergency kit in an accessible location. A plastic storage bin in your garage keeps everything together and ready to go. Include printed copies of instructions for temporary repairs, along with contact information for local roofing contractors. Label everything clearly so family members know what goes where. Check your supplies annually and replace anything that has expired or dried out.
Pro tip: Buy your emergency roof repair materials during calm weather before storm season arrives, so you are not fighting crowds at the hardware store or dealing with supply shortages when a hurricane warning is issued.
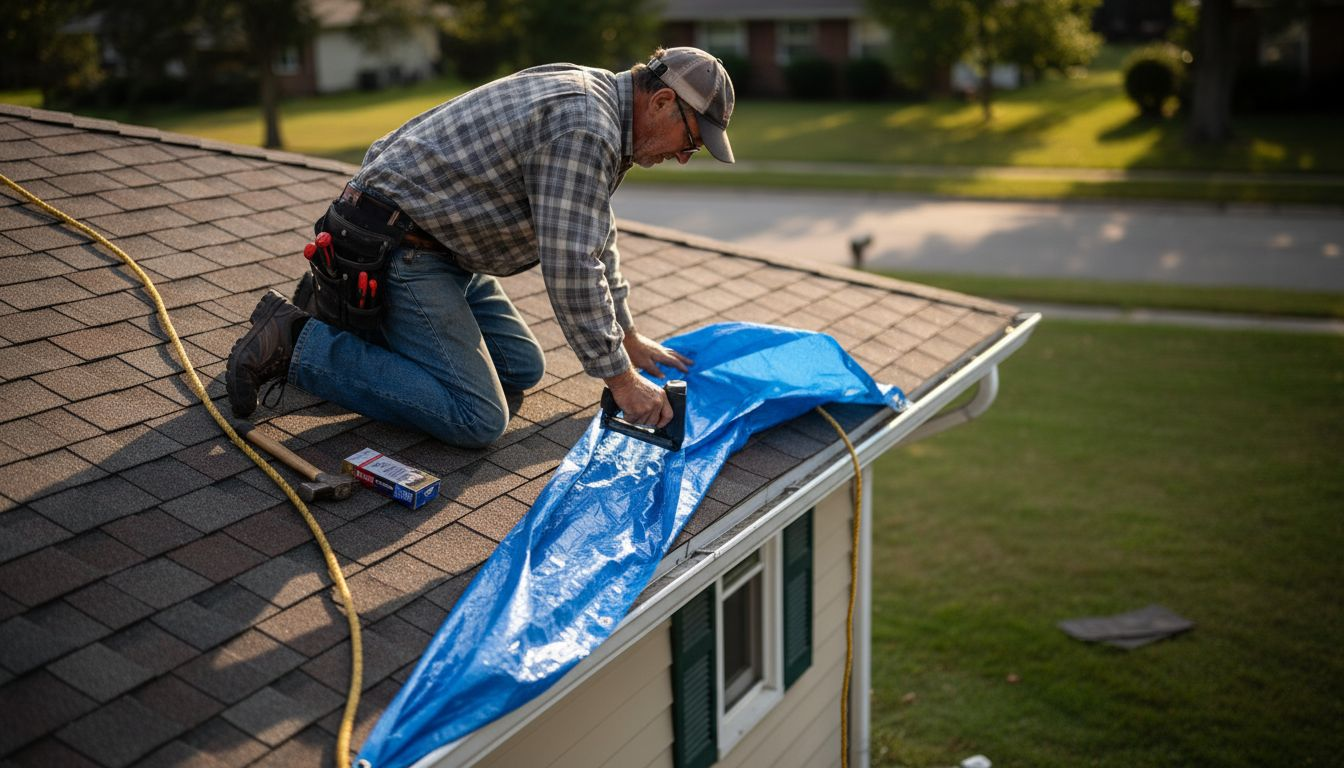
Step 3: Contain Leaks with Temporary Coverings
Now that you have assessed your damage and gathered materials, it’s time to stop water from getting inside your home. Temporary coverings work fast to redirect rain away from damaged areas and buy you time before a professional contractor can arrive. This step is what separates active water damage from contained problems.
Start by preparing the damaged area. If you’re applying a patch or sealant directly to the roof surface, you need clean, dry material to work with. This means clearing away loose debris, leaves, and dirt from the damaged section. Use a broom or brush to sweep the area clean. If water is actively pooling or if the area is wet, dry it as much as possible with towels or allow it to air dry for a bit. Roofing cement and patches adhere much better to clean surfaces. Once the area is prepped, you can apply your temporary fix. For small holes or cracks, use roofing cement according to package directions. Push the cement into the damaged area with a putty knife, then smooth it flat. For larger gaps or missing shingles, cut a fabric patch slightly larger than the damaged area and apply roofing cement underneath, pressing it firmly into place. The goal is to create a watertight seal that blocks water from entering.
For more extensive damage covering larger sections, tarps provide your best defense. Position your tarp to cover the entire damaged area plus an additional 2 to 3 feet beyond it in all directions. This overlap prevents water from flowing around the edges during heavy rain. According to heavy-duty tarp installation guidance, secure tarps with nails or weights to withstand wind and weather exposure. Start by nailing the tarp along one edge, working from the center outward. Pull the tarp taut as you go, then secure the next edge. Use enough fasteners so that the tarp cannot flap or shift in wind. Space nails or fasteners about 12 inches apart along the edges. If your roof has a slope, angle the tarp so that water runs down and away from your home rather than pooling on the covering. Overlap multiple tarps if needed to cover the entire damaged section. The key is ensuring that every pathway for water to enter your home is blocked.
Water management matters as much as the covering itself. When you place a tarp or patch, direct water flow toward gutters or downspouts rather than allowing it to cascade down the side of your house. If water is currently running into your attic, set up buckets or tarps inside to catch it while your temporary repair takes effect. Open windows on the opposite side of your home to allow air circulation, which helps dry out wet materials and prevents mold growth. In Houston’s heat and humidity, mold can establish itself within 24 to 48 hours, so getting air moving through damp spaces is critical. Check your temporary coverings daily for tears, loose edges, or areas where water is still entering. If you spot problems, reinforce or reposition the covering immediately.
Temporary repairs are not permanent solutions. They buy you time and prevent additional damage while you arrange for professional repairs. Most temporary patches and tarps hold up for a week or two in moderate weather, but heavy storms can overwhelm them. This is why getting a professional roofing contractor involved quickly is important. Once your leak is contained and water is no longer entering your home, contact Mister ReRoof for a comprehensive assessment and permanent repair plan tailored to your specific roof type and damage.
Pro tip: Apply temporary coverings during daylight hours with calm or light wind conditions, as working on a wet roof in rain or high wind is dangerous and makes it nearly impossible to create a proper seal.
Step 4: Secure Damaged Areas and Clear Debris
With your temporary coverings in place, you now need to stabilize your roof and remove hazardous materials that could cause additional damage or injury. Loose debris becomes a safety hazard and can make your temporary repairs less effective. Securing damaged areas prevents further deterioration and protects both your home and anyone working on repairs.
Start by carefully removing loose or dangling materials from the damaged section. If shingles are partially torn or flapping in the wind, they need to come off completely rather than remaining in place. Use a pry bar or flat shovel to gently lift and remove broken shingles, working slowly to avoid further damage to the underlying roof deck. Collect all removed materials in bags or buckets placed on the ground below to prevent them from scattering across your yard or neighboring properties. If you have metal roofing and panels are bent or curled, carefully straighten them if possible or remove them if they are too damaged. Do not force anything that could snap suddenly and injure you. Once you remove loose shingles or panels, you may expose the roof decking beneath. This is where securing the damaged area becomes important. If the decking is intact, you can apply adhesive and reattach shingles or install temporary patches. If the decking is cracked, splintered, or soft from water damage, mark these areas so contractors know they need replacement. Never walk on soft or splintered decking as it may collapse under your weight.
According to debris removal and stabilization protocols, clearing away unstable materials prevents injury and allows for proper interim measures to protect the roof. Once loose debris is removed, use roofing nails or fasteners to secure any remaining materials that could lift or shift in wind. If you have partially lifted shingles that are still attached, nail them back down or remove them entirely. For flat roofs with torn membrane, secure the torn edges with roofing cement and fasteners to prevent water from seeping underneath. Metal roofing may have fasteners that have come loose or popped out. Tighten these or replace them with appropriate fasteners designed for metal roofing. The goal is to eliminate anything that moves or flaps because movement allows water to penetrate beneath coverings.
Check your gutters and downspouts while you are securing the roof. Debris from damaged roofing materials often falls into gutters and clogs them, preventing proper water drainage. Remove leaves, shingle granules, and other debris from gutters and downspouts so water can flow freely away from your home. A clogged gutter can cause water to back up under your eaves or overflow down the side of your house, creating new leak points. Use a scoop or your hands with gloves to pull out debris, then flush the gutter with water from a hose to ensure it flows smoothly. If your downspouts are damaged or disconnected, reattach them or direct them so water flows at least 6 feet away from your foundation.
Dispose of debris responsibly. Large quantities of roofing materials need proper disposal or recycling. Contact your local Houston waste management facility to learn about storm debris disposal programs that may be available after severe weather events. Many communities offer temporary debris collection sites for homeowners dealing with storm damage. Do not simply dump roofing materials in vacant lots or allow them to accumulate in your yard where they become a hazard or breeding ground for pests.
Once your damaged areas are secured and debris is cleared, your temporary repairs can function more effectively and your home is safer for anyone walking around it. This also makes the job easier for the professional contractor who will eventually arrive to make permanent repairs.
Pro tip: Wear heavy-duty work gloves and long sleeves when handling broken roofing materials, as edges are sharp and can cause serious cuts, and some older roofing materials may contain fibers that irritate skin.
Step 5: Inspect and Confirm Leak Protection
Your temporary repairs are in place, but the work is not finished until you confirm that water is actually staying out of your home. Inspecting your repairs validates that your emergency measures are working effectively and reveals any weak points before the next storm hits. This verification step gives you confidence that your home is protected and guides whether additional reinforcement is needed.
Start your inspection from inside your home. Go into your attic with a flashlight and look for any signs of water intrusion. Check the underside of the roof decking, the insulation, and the framing members for dampness, staining, or water droplets. If you had water coming in before your repairs, that area should now be dry or at least showing no new water. Mark any areas that are still wet with tape so you can monitor them over the next few days. Sometimes water trapped in insulation takes time to dry out, but you should see improvement within 24 to 48 hours. If water is still actively dripping or flowing into your attic after your repairs, your temporary fix is not working and needs adjustment. Check the ceiling of rooms below the damaged area as well. Look for water stains, soft spots in drywall, or discoloration that indicates water is still entering. According to post repair leak protection verification methods, thorough inspection after emergency interventions confirms the effectiveness of your leak containment measures and identifies any areas needing reinforcement.
The following summary highlights critical post-storm inspection checks:
| Inspection Area | What to Look For | Why It Matters |
|---|---|---|
| Attic | Water stains, dampness | Reveals hidden leaks |
| Roof Surface | Torn coverings, gaps | Assesses repair strength |
| Gutters & Downspouts | Clogs, overflow | Prevents water backup |
| Interior Walls | New stains or discoloration | Catches spreading leaks |
Now move outside to visually inspect your repairs from the ground using binoculars. Look at your tarp coverings to ensure they are still securely fastened with no tears, holes, or loose edges. Wind and weather exposure can create new problems, so check that nails or fasteners are still tight and the tarp is pulling taut without sagging. Inspect any patched areas where you applied roofing cement or fabric patches. The patches should be adhering firmly to the roof surface with no edges lifting or curling upward. If cement or sealant is cracking or separating from the surrounding material, water can sneak underneath. Check your gutters again to confirm they are still clear of debris and water is flowing freely through downspouts. A gutter that has re-clogged with debris will cause water to back up, potentially overflowing and finding new ways into your home. Look at the ground around your foundation and downspouts to ensure water is flowing away from your house rather than pooling against the foundation. Standing water near your foundation creates hydrostatic pressure that can force water through basement walls or crawl space cracks.
Monitor your repairs over the next week, especially if rain is forecast. The stability and integrity of temporary coverings under weather exposure depends on ongoing attention and maintenance. After each rain event, perform a quick interior inspection to confirm no new water is entering. If you notice problems developing, address them immediately before they become major issues. Document your inspection findings with photos and notes, as this information helps your insurance adjuster and the professional contractor understand what happened and what temporary measures you took. This documentation also proves that you acted quickly and responsibly to minimize damage, which can support insurance claims.
If your inspections reveal that your temporary repairs are holding strong and water is no longer entering your home, you have successfully contained the emergency. Your next step is scheduling permanent repairs with a professional roofing contractor. Contact Mister ReRoof to arrange a comprehensive inspection and get a detailed repair estimate. The longer you wait, the greater the risk that temporary repairs will fail and new water damage will occur. Professional repairs restore full protection and prevent secondary damage like mold growth or structural deterioration that compounds the original problem.
Pro tip: Check your temporary repairs after rainfall rather than waiting for the next forecast storm, as small problems become obvious when water is actively flowing and you can address them before conditions worsen.
Protect Your Houston Home Now with Expert Emergency Roof Repairs
Facing sudden roof leaks after a storm can be overwhelming and dangerous. This article clearly shows how crucial it is to assess roof damage accurately, gather the right materials, and apply temporary coverings to prevent further water intrusion. But when you need reliable, lasting protection against Houston’s challenging weather, temporary fixes only go so far. That is where Mister ReRoof steps in to provide professional roof replacement and repair services tailored specifically to local conditions including metal, shingle, flat, and TPO roofing systems.

Don’t wait for temporary leaks to become permanent problems like mold or structural damage. Trust our experienced team at Mister ReRoof to conduct a thorough inspection, secure your property, and deliver durable, storm-resistant roofing solutions with a customer-first approach. Visit our homepage to schedule your free estimate and take the first step toward peace of mind with the top Houston roofing contractor. Emergency repairs require swift action. Contact us today and protect your home from unpredictable weather before the next heavy rain hits.
Frequently Asked Questions
What should I do first during an emergency roof leak?
Before doing anything else, assess the roof damage from the ground using binoculars. Look for missing shingles, cracks, or any obvious signs of structural damage to determine if you need professional help.
How can I temporarily stop a roof leak until repairs are made?
Use a heavy-duty tarp to cover the damaged area, extending it 2 to 3 feet beyond the damage. Secure the tarp tightly using nails or weights to prevent it from moving in strong winds.
What materials do I need for emergency roof repairs?
Gather waterproof coverings like tarps or roofing fabric, roofing cement, nails, and tools such as a utility knife and hammer. Having these items ready before a storm can help ensure quick action is taken to contain leaks.
How can I check if my temporary repairs are effective?
Inspect your attic and interior walls after heavy rain to look for signs of water intrusion. Mark any wet areas and address them immediately to prevent further damage from occurring.
When should I contact a professional roofing contractor?
Contact a professional as soon as you successfully contain the leak with temporary repairs. Schedule an appointment promptly to avoid further damage and restore full protection within a week or two.
What precautions should I take while working on my roof?
Always prioritize your safety by wearing sturdy footwear, gloves, and using a harness if working at height. Ensure the roof is dry and stable before stepping onto it, and never attempt repairs in high winds or rain.
