
Texas weather tests your roof like nowhere else. Hailstorms, scorching heat, and sudden downpours create constant stress on roofing materials, leading to leaks, damaged shingles, and structural concerns. If your roof shows signs of wear, you need a clear action plan to replace it before the next storm hits. This guide walks you through every stage of roof replacement, from gathering tools to final verification, so you can protect your home investment with confidence. Whether you tackle the project yourself or hire professionals, understanding the process ensures quality results and long-term weather resistance.
Table of Contents
- Essential Tools, Materials, And Prerequisites For Roof Replacement
- Step By Step Removal Of Old Roof And Preparation For Installation
- Installing Your New Roof: Materials, Techniques, And Weatherproofing
- Final Checks And Verification: Ensuring Your New Roof Is Secure And Weather-Ready
- Protect Your Texas Home With Expert Roof Replacement Services
- How Long Does A Roof Replacement Usually Take?
Key takeaways
| Point | Details |
|---|---|
| Preparation prevents delays | Gathering the right tools, materials, and permits before starting saves time and reduces safety risks. |
| Systematic removal protects your home | Carefully stripping old roofing and inspecting the deck ensures a solid foundation for new materials. |
| Installation technique matters | Proper underlayment, flashing, and shingle placement create weather-resistant barriers against Texas storms. |
| Final verification ensures durability | Thorough inspection of all components confirms your roof is secure and ready for years of service. |
Essential tools, materials, and prerequisites for roof replacement
Starting a roof replacement without the right equipment creates unnecessary risks and delays. Proper preparation and the right tools reduce replacement time and improve safety. You need specialized equipment to handle Texas heat and height challenges while maintaining efficiency throughout the project.
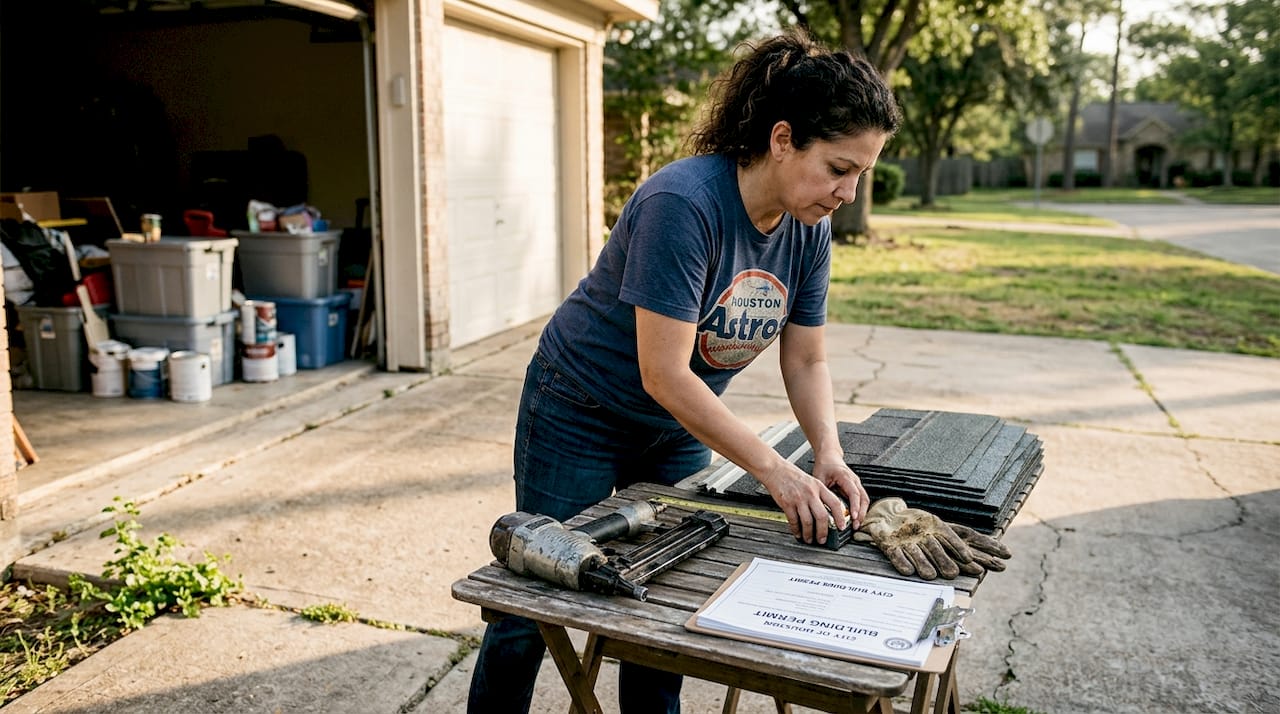
Essential tools include a roofing nail gun for fast shingle installation, flat pry bars for removing old materials, and roofing shovels designed to strip shingles quickly. A chalk line helps maintain straight rows, while a utility knife cuts shingles and underlayment precisely. Measuring tape, hammers, and tin snips round out your basic toolkit. For safety, invest in a quality harness system rated for roof work, non-slip boots with ankle support, gloves that protect against sharp edges, and safety glasses.
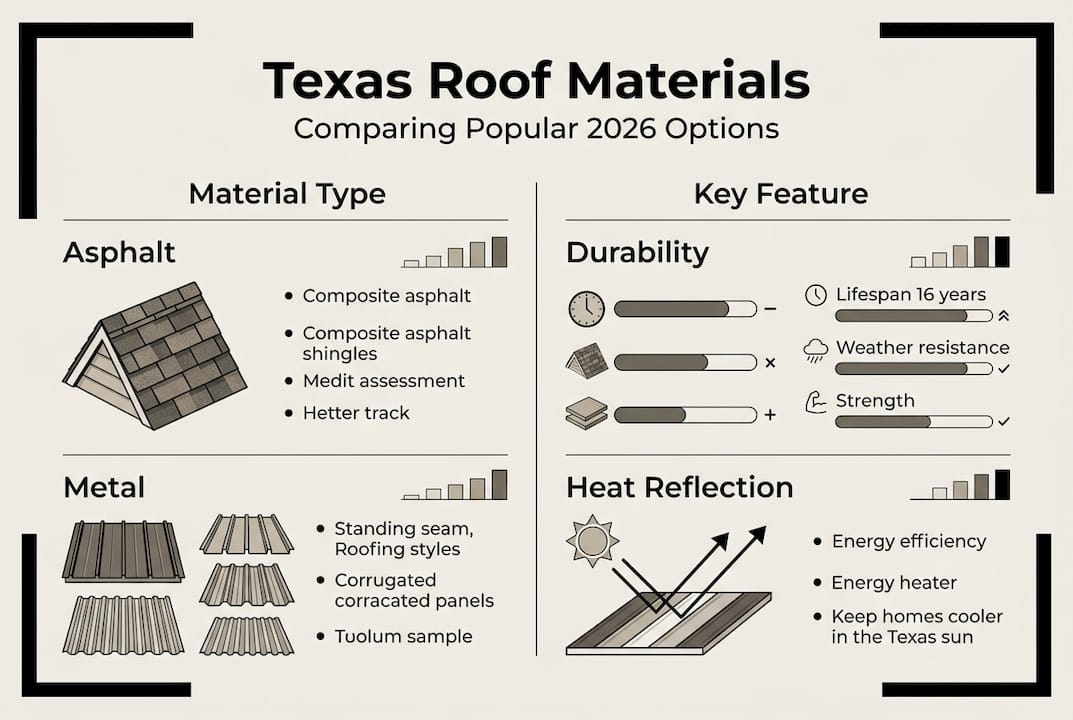
Materials vary based on your chosen roofing system. Asphalt shingles remain popular for their balance of cost and durability, while metal roofing offers superior wind resistance and longevity. TPO membranes work well for flat or low-slope sections. Beyond the primary roofing material, you need synthetic underlayment for moisture protection, drip edge to direct water away from fascia, valley flashing for vulnerable joints, and roof vents for proper attic ventilation. Roofing nails must match your material specifications.
Material comparison for Texas climates:
| Material | Lifespan | Wind Resistance | Heat Reflection | Cost Range |
|---|---|---|---|---|
| Asphalt Shingles | 15-30 years | Good | Moderate | $$ |
| Metal Roofing | 40-70 years | Excellent | High | $$$$ |
| TPO Membrane | 20-30 years | Very Good | High | $$$ |
Before starting work, check local building codes and secure necessary permits. Many Texas municipalities require permits for roof replacement, and inspections ensure your work meets safety standards. Weather timing matters significantly. Avoid working during summer’s peak heat hours or when rain threatens. Early morning or late afternoon provides better working conditions and reduces heat exhaustion risks.
Pro Tip: Create a staging area on the ground for materials and debris. This keeps your work zone organized and prevents dangerous trips over scattered supplies.
Step by step removal of old roof and preparation for installation
Removing your existing roof safely requires methodical execution and attention to structural integrity. Careful removal of roofing materials prevents damage and delays. Start at the roof peak and work downward in sections, maintaining control over debris and minimizing risks.
-
Begin shingle removal at the ridge cap using a flat pry bar to lift nails. Work your way down in horizontal rows, using a roofing shovel to slide under shingles and pop them free. Toss removed materials directly into a dumpster or designated ground area to avoid dangerous accumulation on the roof surface.
-
Once shingles are cleared from a section, inspect the underlayment and remove it completely. Pull all remaining nails from the roof deck using a pry bar or hammer claw. Missing even a few nails creates bumps under new shingles and potential leak points. Use a magnetic roller to collect scattered nails from the roof surface and ground.
-
Examine the exposed roof decking carefully for signs of water damage, rot, or structural weakness. Press on suspicious areas to check for soft spots. Replace any damaged plywood or OSB sheathing immediately. Cut out compromised sections with a circular saw, ensuring cuts land on rafter centers for proper support. Install new decking with the rough side up for better shingle adhesion, securing it with deck screws every six inches along rafters.
-
Clear all debris from valleys, edges, and penetrations. Inspect flashing around chimneys, vents, and skylights. Remove and replace any corroded or damaged flashing now, before new roofing goes on. This prevents having to lift new shingles later for repairs.
Safety during removal demands constant vigilance. Texas heat intensifies quickly, so hydrate frequently and take breaks in shade. Secure your safety harness to a solid anchor point before stepping onto the roof. Never work alone. Have a ground helper to pass materials, monitor weather changes, and respond to emergencies. Wet or windy conditions make roof work extremely dangerous, so postpone if conditions deteriorate.
Working on a roof in Texas summer heat requires strategic breaks every 30 minutes. Heat exhaustion happens fast at elevation, where temperatures climb even higher than ground level. Watch for dizziness, excessive sweating, or confusion in yourself and helpers.
Pro Tip: Cover exposed decking with tarps at the end of each work day. Unexpected rain can soak bare wood and create mold issues before you install underlayment.
Installing your new roof: materials, techniques, and weatherproofing
Installing roofing materials correctly creates the weather barrier that protects your home for decades. Proper installation techniques improve roof durability against harsh weather. Following manufacturer specifications and building codes ensures your roof performs as designed when storms arrive.
-
Start by rolling out synthetic underlayment across the entire roof deck. Begin at the eaves and work upward, overlapping each row by six inches. Secure underlayment with cap nails or staples every 12 inches along seams and 24 inches in field areas. This moisture barrier protects against water infiltration if shingles fail.
-
Install drip edge along all eaves before laying shingles. This metal flashing directs water into gutters and prevents fascia rot. Overlap sections by two inches and nail every 12 inches. Apply ice and water shield in valleys and along eaves in areas prone to ice dams, even though Texas rarely sees ice. This extra protection helps during severe rain events.
-
Begin shingle installation at the lower left corner of the roof. Snap a chalk line to ensure your first course runs perfectly straight. Starter strip shingles go along the eave, overhanging the drip edge by half an inch. This creates a clean edge and proper water runoff. Nail each shingle with four to six nails depending on wind rating requirements, placing nails in the manufacturer’s specified nail zone.
-
Work upward in horizontal courses, offsetting each row by six inches to create a staggered pattern. This offset prevents water channels from forming between shingle edges. Maintain consistent exposure, typically five to six inches depending on shingle type. Check alignment every few rows with your chalk line to catch drift before it becomes noticeable.
-
Install valley flashing before shingles reach valley areas. Metal valleys provide superior protection compared to woven shingle valleys. Cut shingles at an angle where they meet the valley, leaving a two-inch gap on each side of the valley center. Seal cut edges with roofing cement to prevent water intrusion.
-
Flash all penetrations properly. Pipe boots seal around vent pipes, while step flashing protects sidewalls and chimneys. Each piece of step flashing tucks under the shingle above and over the shingle below, creating a shingled water barrier. Apply a bead of roofing sealant under flashing edges for extra protection.
Installation sequence priorities:
- Underlayment and moisture barriers first
- Drip edge and valley flashing second
- Starter strips and first shingle course third
- Work upward maintaining alignment and overlap
- Ridge cap and final sealing last
Ventilation prevents heat buildup and extends roof life. Install ridge vents along the peak to allow hot air escape. Soffit vents at the eaves bring cool air in, creating natural circulation. Proper ventilation reduces cooling costs and prevents premature shingle deterioration from trapped heat.
Pro Tip: Work on one roof section at a time rather than spreading materials across the entire surface. This approach lets you complete weatherproof sections before moving on, protecting your home if weather interrupts the project.
Final checks and verification: ensuring your new roof is secure and weather-ready
Completing installation is only part of the process. Thorough final inspection prevents costly repairs later. Systematic verification catches issues before they cause leaks or failures, giving you confidence in your investment.
Inspect every shingle for proper sealing and secure attachment. Walk the roof carefully, looking for lifted corners, missing nails, or gaps in coverage. Press gently on shingles to confirm they are firmly adhered. Check that all nail heads sit flush with the shingle surface. Protruding nails create leak points and should be hammered down or replaced.
Examine all flashing installations closely. Valley flashing should lie flat without gaps or buckling. Step flashing around chimneys and walls must overlap correctly, with each piece shingled properly. Pipe boots should seal tightly around vent pipes with no cracks in the rubber gasket. Apply additional roofing cement to any questionable seals.
Verify ridge cap installation along the entire peak. Ridge caps protect the vulnerable junction where roof planes meet. Each cap should overlap the previous one by at least five inches, and nails must penetrate both roof decks on either side of the ridge. Missing or improperly installed ridge caps allow water infiltration and wind damage.
Check roof ventilation components. Ridge vents should run continuously along the peak without gaps. Soffit vents must be clear of insulation or debris blocking airflow. Proper ventilation balance requires one square foot of ventilation for every 150 square feet of attic space.
Post-installation verification checklist:
- All shingles securely fastened with proper nail placement
- Flashing sealed and overlapped correctly at all penetrations
- Drip edge installed along all eaves and rakes
- Valley protection complete with no exposed underlayment
- Ridge caps covering entire peak with proper overlap
- Ventilation systems clear and functional
- Gutters reattached and debris cleared
- Ground area cleaned of all nails and materials
Inspect your attic interior during the first rain after installation. Look for any water stains, drips, or moisture on rafters and decking. Early detection of leaks allows quick repairs before water damages insulation or ceiling materials. Most installation issues show up during the first significant rain event.
Schedule a professional inspection if you completed the work yourself. Many insurance companies require certified inspections for coverage. A professional can spot subtle issues and provide documentation of proper installation. This inspection also establishes a baseline for future maintenance and warranty claims.
Roof settling timeline expectations:
| Timeframe | What to Monitor | Action Needed |
|---|---|---|
| First Week | Shingle adhesion in heat | Check for lifting corners |
| First Month | Initial storm performance | Inspect after heavy rain |
| First Year | Seasonal expansion/contraction | Annual inspection recommended |
| Ongoing | Storm damage and wear | Immediate repair of damage |
Document your installation with photos of completed work, material receipts, and warranty information. This documentation proves valuable for insurance claims, future sales, and warranty service. Store records in a waterproof location with other home maintenance files.
Pro Tip: Mark your calendar for biannual roof inspections in spring and fall. Catching minor issues like loose shingles or clogged valleys prevents major repairs and extends your roof’s service life significantly.
Protect your Texas home with expert roof replacement services
Understanding roof replacement steps helps you make informed decisions, but professional installation offers advantages that save time and ensure quality results. Mister ReRoof specializes in protecting Texas homes with shingle roof replacement in Sugar Land, metal roof replacement in Victoria, and TPO roof replacement in El Campo tailored to local weather challenges.
Our experienced crews handle every phase from material selection through final inspection, delivering roofing systems built to withstand hurricanes, hail, and intense heat. We work with top manufacturers to provide warranties that protect your investment for decades. Contact Mister ReRoof today for a free estimate and discover how professional installation gives you peace of mind and lasting protection against Texas weather.
How long does a roof replacement usually take?
How long does a roof replacement usually take?
A typical residential roof replacement can take one to three days depending on scope and weather. Smaller homes with simple roof designs often complete in a single day with an experienced crew. Larger homes, complex roof layouts with multiple valleys and penetrations, or weather delays extend the timeline. Professional teams work efficiently to minimize disruption while maintaining quality standards.
Can I do a roof replacement myself or should I hire a professional?
DIY roof replacement saves labor costs but demands significant skill, proper safety equipment, and physical capability to work at heights in Texas heat. Mistakes in installation void material warranties and create leak risks that cost more to fix than professional installation would have cost initially. Professionals offer speed, expertise, and warranties that protect your investment. Most homeowners find the safety risks and complexity make professional installation worthwhile.
What maintenance is required after a roof replacement?
Regular inspections after major storms catch damage before it spreads. Clean gutters quarterly to prevent water backup that can lift shingles and rot fascia boards. Replace damaged or missing shingles immediately rather than waiting for problems to multiply. Trim overhanging branches that scrape shingles or drop debris. Annual professional inspections identify subtle issues like failing flashing or ventilation problems before they cause interior damage.
What roofing material works best for Texas weather?
Metal roofing excels in Texas conditions, reflecting heat to reduce cooling costs while resisting high winds and hail damage better than other options. Asphalt shingles offer good performance at lower cost, especially impact-resistant varieties designed for hail zones. TPO membranes work well for flat or low-slope roofs common on commercial buildings and modern homes. Your choice depends on budget, home style, and specific weather risks in your area. All materials perform well when properly installed with adequate ventilation.
How much does a roof replacement cost in Texas?
Roof replacement costs vary widely based on size, material choice, roof complexity, and labor rates in your specific area. Asphalt shingle roofs typically cost less per square foot than metal or tile options. Expect higher costs for steep pitches, multiple stories, or extensive repairs to underlying decking. Get multiple detailed quotes that break down material and labor costs separately. The lowest bid is not always the best value if it uses inferior materials or shortcuts proper installation techniques. Quality installation protects your investment for decades.