
Summer storms in Houston can leave many homeowners wondering if their current roof is strong enough to handle the next downpour. When it comes to protecting your home from fierce winds and heavy rain, choosing a metal roof offers a solution built for resilience. With guidance from the International Building Code and proven surface preparation methods, you gain insight into what makes a secure metal roofing installation a lasting investment for weather protection and curb appeal.
Table of Contents
- Step 1: Assess Your Roof Structure And Materials
- Step 2: Prepare The Surface For Metal Panels
- Step 3: Install Underlayment And Flashing Properly
- Step 4: Attach Metal Roofing Panels Securely
- Step 5: Seal, Inspect, And Test For Weather Protection
Quick Summary
| Key Point | Explanation |
|---|---|
| 1. Assess Roof Condition First | Inspect your roof for structural issues like wood rot or water damage before metal roof installation. |
| 2. Prepare Surface Meticulously | Clean and ensure the roof surface is dry and smooth to support the new metal panels effectively. |
| 3. Install Underlayment and Flashing Correctly | Proper installation of underlayment and flashing prevents water leaks and enhances roof durability against weather conditions. |
| 4. Secure Panels Using Proper Techniques | Use specific fastening methods and ensure panels overlap correctly to withstand wind and moisture. |
| 5. Thoroughly Seal and Test | Seal all seams and perform water resistance tests to confirm there are no leaks in the new roofing system. |
Step 1: Assess Your Roof Structure and Materials
Successfully installing a metal roof in Houston starts with a comprehensive evaluation of your existing roof structure and materials. Before any panels get lifted or measurements taken, understanding your current roofing system is crucial for a seamless metal roof installation.
Begin by conducting a thorough visual inspection focusing on your roof deck’s condition. Roof structure requirements outlined in the International Building Code specify critical elements like structural integrity, load capacity, and weatherproofing compatibility. Check for any signs of wood rot, water damage, or structural weakness that could compromise your new metal roofing system. Measure the roof slope carefully and evaluate existing decking materials such as plywood or oriented strand board (OSB) to confirm they can support metal roofing installation.
Next, assess your current roof layers and underlying materials. Houston’s dynamic weather demands a robust roofing system that can withstand intense heat and occasional severe storms. Examine your existing underlayment, looking for any deterioration or gaps that might need repair before metal panel installation. Consider the specific fastening techniques appropriate for your roof’s geometry and local building codes, ensuring a secure attachment that can resist wind uplift and environmental stressors.
Here is a summary of potential roof issues and their impact on metal roofing installation:
| Roof Issue | Potential Impact | Recommended Action |
|---|---|---|
| Wood rot | Weakens support structure | Replace affected decking |
| Water damage | Compromises durability | Repair and dry before install |
| Uneven surface | Hinders panel alignment | Level deck or add new board |
| Inadequate slope | Reduces water drainage | Adjust slope if possible |
| Poor underlayment | Increases leak risk | Install new high-quality layer |
Pro Tip: Before committing to installation, hire a professional roofing inspector who specializes in metal roof assessments to provide a detailed structural evaluation and identify any potential challenges specific to your home.
Step 2: Prepare the Surface for Metal Panels
Successfully installing metal roofing requires meticulous surface preparation. Your goal is to create a clean, smooth, and structurally sound foundation that will support your new metal panels and ensure long lasting performance.
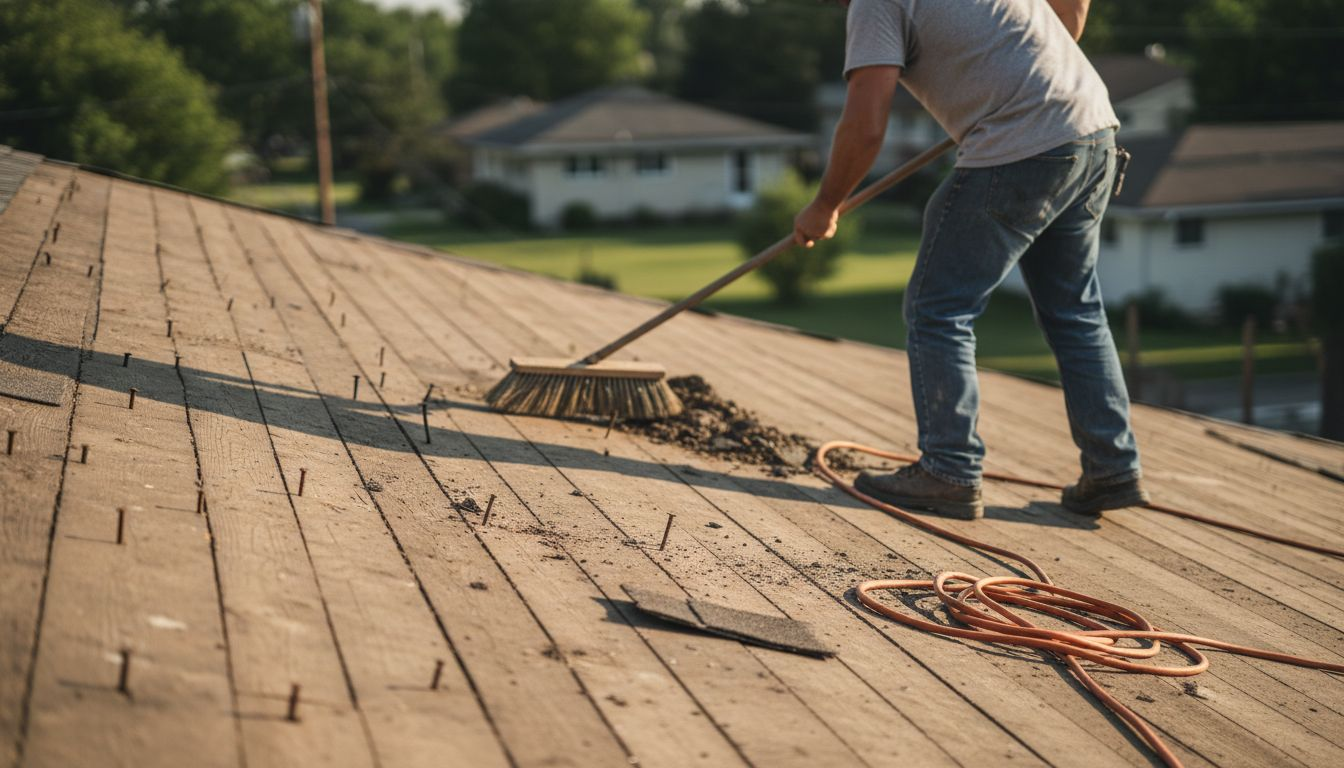
Start by thoroughly cleaning your existing roof surface, removing all debris, old fasteners, and loose materials. Panel surface preparation guidelines recommend ensuring the substrate is completely dry and free from dirt, rust, or contaminants that could interfere with panel adhesion. Inspect the roof deck carefully for any signs of damage, wood rot, or structural weakness. Pay special attention to areas around roof penetrations like vents, chimneys, and skylights, as these zones often require additional preparation and potential reinforcement.
Next, focus on creating a smooth substrate that will support metal panel installation. Check the roof surface for flatness and make necessary repairs to ensure an even base. Verify that your existing roof deck can handle the specific load requirements of metal roofing. If your current decking shows signs of deterioration, consider installing new plywood or oriented strand board to provide a solid foundation. Confirm all attachment points are secure and capable of supporting the metal panels during installation and throughout their service life.
Pro Tip: Rent or borrow a moisture meter to thoroughly test your roof deck for hidden water damage and moisture issues before starting panel installation.
Step 3: Install Underlayment and Flashing Properly
Understanding how to install underlayment and flashing correctly is critical to protecting your metal roof from water infiltration and ensuring long term durability. This step requires precision and attention to detail to create a watertight barrier that shields your home from Houston’s unpredictable weather conditions.
Metal flashing installation techniques recommend using corrosion resistant materials strategically placed at roof intersections, edges, and penetrations. Begin by carefully laying synthetic underlayment across the entire roof surface, ensuring complete coverage with minimal wrinkles or gaps. Overlap each row by at least 4 inches, starting from the lowest point of the roof and working upward to maintain proper water drainage. Pay special attention to areas around chimneys, vents, and skylights where water can potentially seep underneath the roofing system.
Next, focus on installing step flashing precisely at wall intersections and roof valleys. Cut flashing pieces to fit snugly against sidewalls and roofing panels, creating a seamless water diversion system. Each piece should overlap the previous one by at least 2 inches, creating a cascading effect that channels water away from vulnerable areas. Use corrosion resistant nails sparingly and strategically, avoiding placement that might compromise the flashing’s ability to flex and move with temperature changes.
Pro Tip: Use a high quality roofing sealant on all flashing seams and nail heads to create an additional water resistant barrier and prevent potential leaks.
Below is a quick reference for essential installation materials and their purposes:
| Material | Primary Purpose | Key Benefit |
|---|---|---|
| Synthetic underlayment | Shields deck from moisture | Enhanced water barrier |
| Step flashing | Redirects water at joints | Prevents water leaks |
| Roofing screws w/ washers | Secure metal panels | Maintain watertight seal |
| Sealant | Seal seams and fasteners | Extra leak protection |
Step 4: Attach Metal Roofing Panels Securely
Securing metal roofing panels is a critical process that demands precision and careful technique to ensure your roof can withstand Houston’s challenging weather conditions. Proper installation will protect your home from potential wind damage and water infiltration.
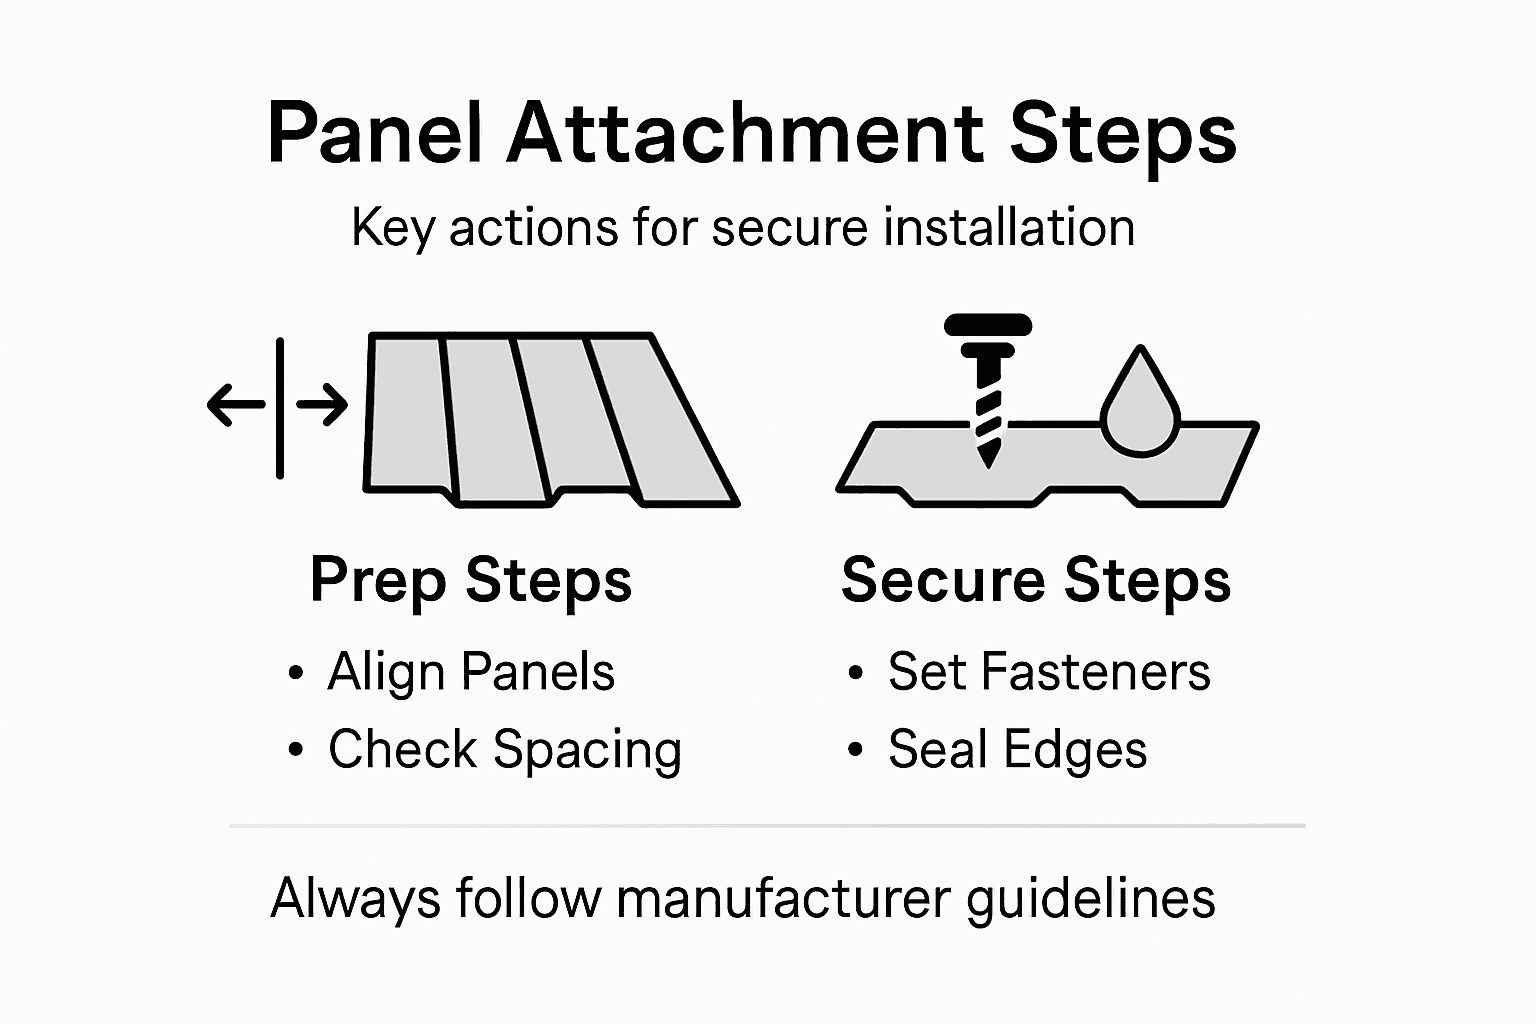
Residential roof assembly requirements specify exact guidelines for panel attachment that are essential for structural integrity. Begin by carefully aligning each metal panel along the roof edge, ensuring they overlap correctly according to manufacturer specifications. Use specialized metal roofing screws with neoprene washers that create a watertight seal. Space fasteners consistently across each panel approximately 12 to 16 inches apart, concentrating additional fasteners along panel edges and at critical connection points to maximize wind resistance.
When attaching panels, maintain consistent pressure and avoid over tightening screws. Each fastener should sit flush with the panel surface without breaking the protective washer or creating dimples that could compromise water resistance. Work systematically from the bottom of the roof upward, maintaining straight alignment and allowing for slight thermal expansion. Check that each panel locks securely into the adjacent panel using the manufacturer recommended interlocking mechanism, which provides additional structural stability against potential wind uplift.
Pro Tip: Use a magnetic screw holder attachment on your drill to prevent dropping screws and maintain a steady workflow during panel installation.
Step 5: Seal, Inspect, and Test for Weather Protection
The final stage of metal roofing installation involves creating a comprehensive weather barrier that will protect your Houston home from extreme conditions. Your goal is to ensure every seam, joint, and potential moisture entry point is thoroughly sealed and tested.
Residential roofing inspection standards require meticulous examination of your newly installed metal roof. Begin by systematically inspecting all panel connections, checking that each fastener is properly seated and sealed. Apply high quality silicone based sealant to all potential water entry points including around vents, chimneys, skylights, and any roof penetrations. Pay special attention to valley areas and roof edges where water can potentially accumulate or find its way underneath the panels.
Conduct a comprehensive water resistance test by carefully simulating rainfall conditions. Use a garden hose to spray water across different roof sections, watching for any signs of leakage or water penetration. Check interior attic spaces for any moisture signs or potential weak points. Verify that all panel interlocks are functioning correctly and that the roof surface maintains a smooth, consistent appearance without any bulging or misalignment that could compromise its protective capabilities.
Pro Tip: Schedule your roof inspection during mild weather conditions and have a second person inside the attic to help identify any potential water infiltration points during testing.
Secure Your Houston Home with Expert Metal Roofing Installation
Installing a metal roof in Houston demands precise attention to your roof’s structure, surface preparation, underlayment, flashing, and panel attachment to ensure lasting weather resistance and durability. If you have concerns about wood rot, water damage, or proper sealing techniques highlighted in the metal roofing installation guide, you are not alone. Many homeowners face challenges protecting their homes from Houston’s intense heat and storms while needing a roofing solution built to last.
At Mister ReRoof, we specialize in professional metal roof replacements tailored to Houston’s unique weather demands. Our experienced team meticulously inspects and prepares your roof using industry-leading methods to resolve issues like uneven surfaces and compromised decking. We guarantee precise underlayment and flashing installation combined with expertly secured metal panels for superior wind resistance and leak prevention. Trust our commitment to superior quality and customer satisfaction to protect your home.
Discover how Mister ReRoof brings your metal roofing project to life with long-lasting solutions you can rely on.
Learn more about our residential roofing services and take the first step toward a stronger roof today.
Get your free inspection and estimate now and experience the peace of mind that comes with expert metal roofing installation.
Frequently Asked Questions
What is the first step in metal roofing installation for my home?
To begin installing a metal roof, assess your current roof structure and materials. Conduct a visual inspection to identify signs of damage and evaluate the roof deck’s condition, checking for structural integrity and load capacity before proceeding with installation.
How do I prepare the surface before installing metal panels?
Prepare the surface by thoroughly cleaning your existing roof, removing all debris and loose materials. Ensure the substrate is dry and free from contaminants, and make necessary repairs to create a smooth, even base for the new metal panels.
What materials are essential for underlayment and flashing installation?
Essential materials include synthetic underlayment to shield the deck from moisture and step flashing to redirect water at joints. Use corrosion-resistant roofing screws with washers to secure panels, and apply high-quality sealant to seams and fasteners for extra leak protection.
How should I attach metal roofing panels securely?
Attach metal roofing panels by aligning them along the roof edge and using specialized fasteners spaced 12 to 16 inches apart. Ensure each screw is flush with the panel surface and avoid over-tightening to maintain a watertight seal and structural integrity.
What steps should I take to seal and inspect my metal roof after installation?
After installation, inspect all panel connections and fasteners for proper seating and sealing. Apply silicone-based sealant to potential water entry points and conduct a water resistance test by spraying sections of the roof to check for leaks before finishing the project.
