
Extreme heat and sudden storms in Houston put every roof to the test, which is why over 50 percent of American commercial properties now choose TPO roofing for superior durability and weather resistance. If you own a home or business in this region, the way your TPO roof is installed can make the difference between lasting protection and costly repairs. This guide delivers clear steps focused on preparation, installation, and long-term reliability for both residential and commercial projects.
Table of Contents
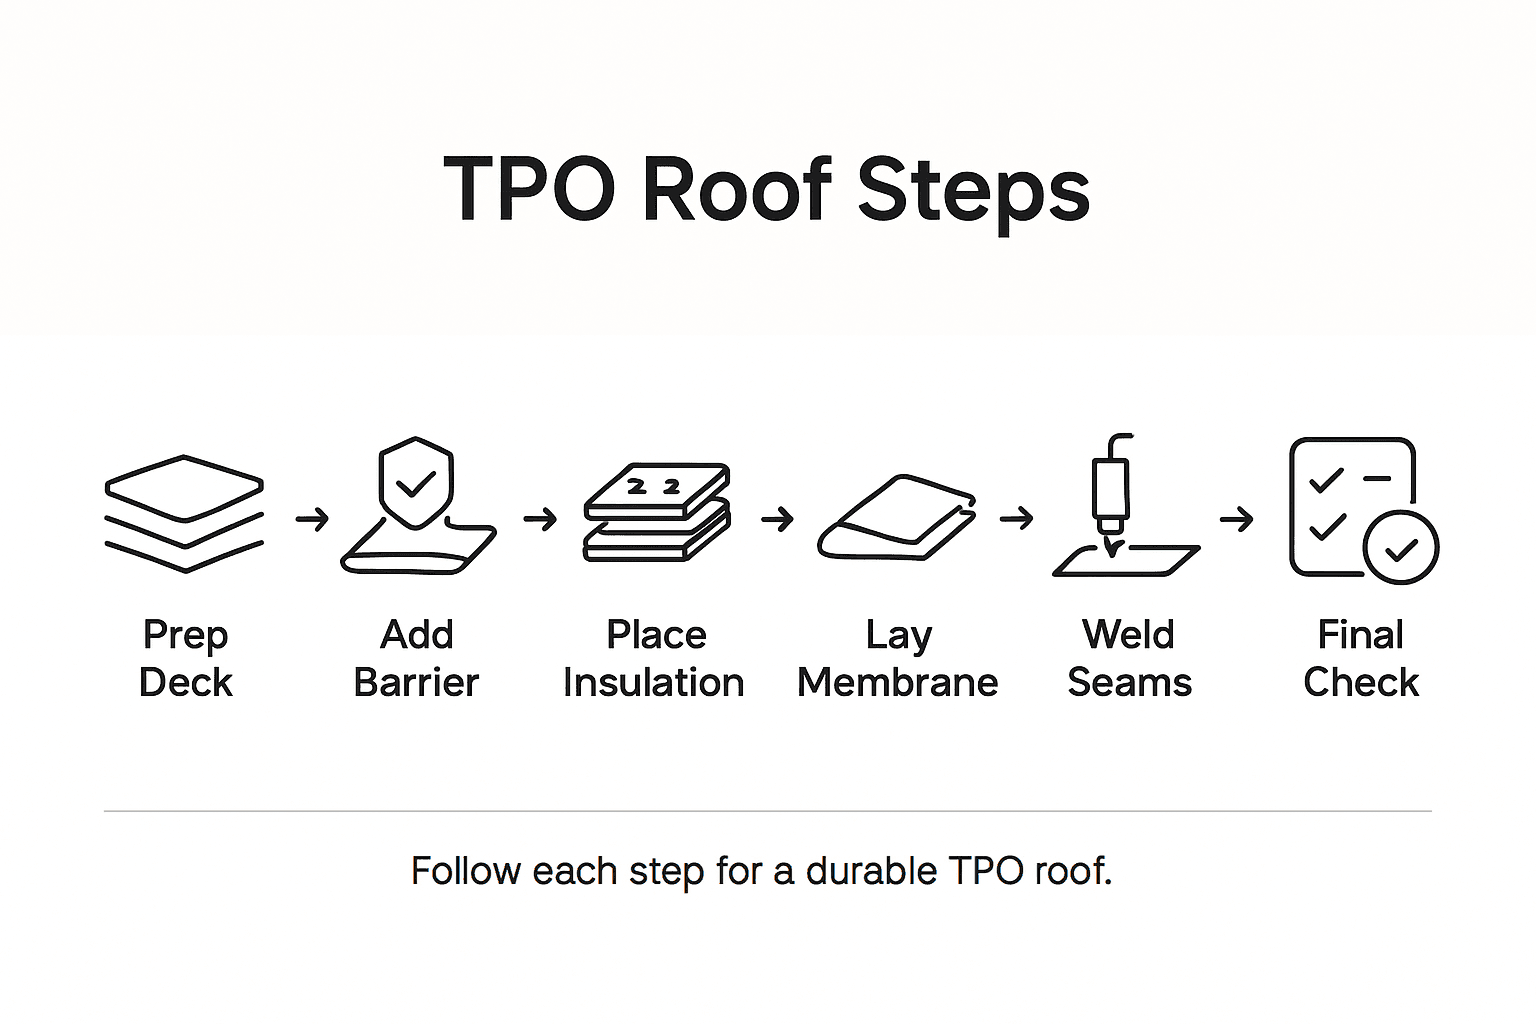
- Step 1: Prepare The Roof Surface For TPO Installation
- Step 2: Install Insulation And Vapor Barriers Properly
- Step 3: Position And Secure TPO Membrane Efficiently
- Step 4: Seal TPO Seams And Flashings With Precision
- Step 5: Inspect And Test TPO Roof For Quality Assurance
Quick Summary
| Key Insight | Explanation |
|---|---|
| 1. Thorough Surface Prep is Crucial | Clean and smooth deck preparation enhances membrane adhesion and prevents leaks in the future. |
| 2. Proper Insulation and Vapor Barriers | Strategically placed insulation and sealed vapor barriers improve energy efficiency and protect against moisture. |
| 3. Precision in Membrane Placement | Accurate alignment and secure fastening of the TPO membrane create a seamless protective layer against weather elements. |
| 4. Seal Seams and Flashings Carefully | Consistent seam welding and precise flashing installation ensure a watertight roofing system, crucial for durability. |
| 5. Comprehensive Inspection and Testing | Systematic quality checks, including leak detection, confirm the integrity and performance of the completed roofing system. |
Step 1: Prepare the Roof Surface for TPO Installation
Successfully installing a TPO roof starts with immaculate surface preparation. Your goal is creating a clean, smooth foundation that ensures maximum membrane adhesion and long term performance. Proper surface preparation is critical for preventing future leaks and maintaining roof integrity.
Begin by thoroughly inspecting the existing roof deck for damage, moisture, or structural irregularities. Remove all debris, dirt, and loose materials using industrial sweepers or power brooms. Check for uneven areas, punctures, or soft spots that could compromise the new TPO membrane. If you discover damaged sections, repair them completely before continuing. Verify the surface is completely dry and smooth, addressing any areas of standing water or significant substrate imperfections.
Ensure your substrate meets manufacturer specifications for flatness and structural integrity. For commercial or residential roofs in Houston, this typically means a clean, dry surface with minimal undulations. Follow manufacturer guidelines carefully to confirm your specific roof meets all recommended preparation standards before membrane installation.
Professional Tip: Invest in a professional moisture meter to detect hidden water damage that visual inspections might miss, preventing potential future roofing failures.
Step 2: Install Insulation and Vapor Barriers Properly
Preparing for TPO membrane installation requires strategic insulation and vapor barrier placement. Your objective is creating a thermal barrier that prevents moisture intrusion while providing optimal energy efficiency for your roof system.
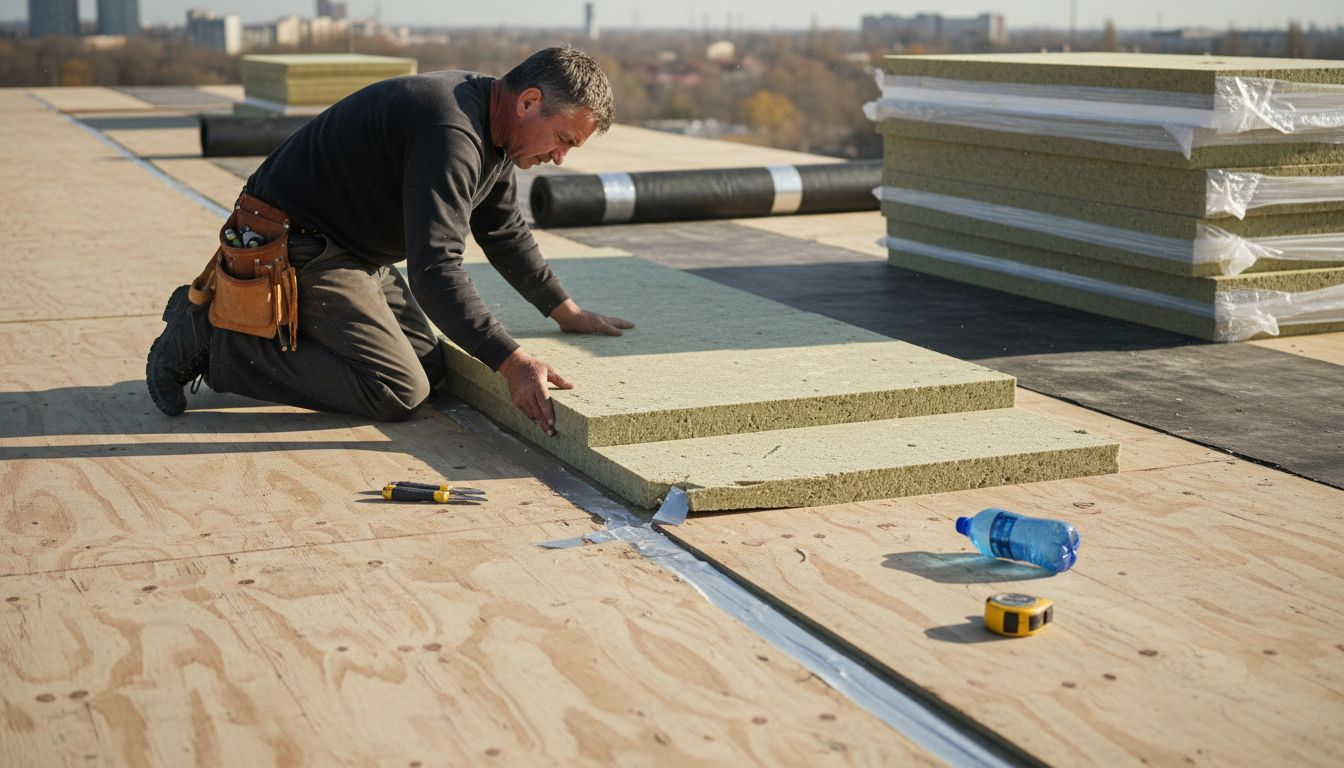
Begin by carefully selecting manufacturer approved insulation boards that match your specific roof requirements. Proper insulation installation demands multiple layers with strategically offset joints to minimize thermal bridging. Place initial insulation panels tightly together, ensuring no gaps exist between boards. Subsequent layers should be installed with staggered joints to create a continuous, uninterrupted thermal protection surface. Pay special attention to edge details and penetration areas, cutting insulation precisely to maintain a smooth, even substrate.
Verify that vapor barriers are completely sealed and continuous before membrane installation. These critical layers prevent moisture migration and protect the roof assembly from potential condensation issues. In Houston’s humid climate, proper vapor barrier installation becomes even more essential for long term roof performance.
Professional Tip: Use a laser level when installing insulation boards to guarantee a perfectly flat surface and eliminate potential future membrane stress points.
Step 3: Position and Secure TPO Membrane Efficiently
Successfully installing a TPO roof membrane requires precision, patience, and methodical placement. Your goal is creating a seamless protective layer that will shield your property from Houston’s challenging weather conditions.
Proper membrane positioning begins with carefully unrolling the membrane across your prepared substrate. Start at the lowest point of the roof, allowing slight overlap between membrane sections to ensure complete coverage. Align each section meticulously, avoiding wrinkles or folds that could compromise the roof’s integrity. Use mechanical fasteners and adhesives as specified by manufacturer guidelines to secure the membrane firmly along edges and critical connection points.
Execute test welds carefully to prevent potential seam failures. Follow manufacturer installation recommendations precisely to maintain consistent quality and enhance membrane durability. Pay close attention to temperature conditions during installation, as extreme heat or cold can impact welding performance and overall membrane effectiveness.
Professional Tip: Work in small sections and use a hot air welding gun with consistent temperature settings to achieve strong, uniform membrane seams.
Step 4: Seal TPO Seams and Flashings with Precision
Successfully sealing TPO membrane seams and flashings is critical for creating a watertight roofing system that protects your property against Houston’s unpredictable weather conditions. Your ultimate goal is preventing potential water infiltration and ensuring long term roof durability.
Precise seam welding techniques require specialized hot air welding equipment and meticulous attention to detail. Begin by cleaning membrane edges thoroughly, removing any debris or moisture that could compromise the seal. Set your hot air welding gun to manufacturer recommended temperatures and move consistently to create uniform welds. Pay special attention to overlap areas, ensuring complete fusion between membrane sections without gaps or incomplete connections.
Flashing installation demands equal precision, particularly around roof penetrations like vents, pipes, and mechanical units. Extend flashings vertically with mechanical fasteners and apply appropriate sealants to protect roof edges. Verify that all vertical surfaces receive proper membrane coverage, using primers and adhesives specified by manufacturer guidelines to guarantee robust waterproofing performance.
Professional Tip: Invest in a digital infrared thermometer to monitor and maintain precise welding temperatures during seam installation.
Step 5: Inspect and Test TPO Roof for Quality Assurance
Quality assurance represents the final critical phase of your TPO roof installation process. Your comprehensive inspection will validate the integrity and performance of the entire roofing system against potential future challenges.
Quality control testing requires systematic and thorough examination of multiple roof components. Begin with a detailed visual inspection of seam welds, looking for consistent fusion, uniform width, and absence of gaps or incomplete connections. Use non destructive testing methods like electronic leak detection to identify potential weak points invisible to the naked eye. Pay special attention to membrane edges, penetration areas, and complex roof intersections where water infiltration risks are highest.
Performance verification involves measuring membrane thickness, checking weathering resistance, and ensuring all installation guidelines have been meticulously followed. Document your findings comprehensively, creating a permanent record that can support future maintenance and warranty claims. Verify that all seams meet manufacturer specifications and that mechanical fasteners are securely installed without compromising membrane integrity.
Professional Tip: Schedule your final inspection during optimal daylight conditions to ensure maximum visibility and accurate assessment of your TPO roof installation.
Here’s a comparison of tool types and their function during TPO roof installation:
| Tool | Function | Benefit During Installation |
|---|---|---|
| Moisture meter | Detect hidden water | Prevents future leaks |
| Laser level | Level insulation boards | Ensures even surface |
| Hot air gun | Weld membrane seams | Creates strong, uniform seals |
| Infrared thermometer | Monitor weld temperature | Avoids seam failures |
| Leak detector | Find hidden leaks | Ensures thorough quality check |
Here’s a summary of each key step in TPO roof installation and its main objective:
| Step | Primary Goal | Essential Focus |
|---|---|---|
| Surface Prep | Ensure clean, smooth deck | Remove debris, fix damage, dry substrate |
| Insulation & Vapor Barrier | Prevent thermal loss, moisture | Tight joints, sealed vapor layer |
| Membrane Placement | Seamless weatherproofing | Precise alignment, proper fastening |
| Seams & Flashings | Achieve watertight seal | Uniform welds, protected penetrations |
| Inspection & Testing | Confirm system quality | Visual check, leak detection, record findings |
Secure Your Houston Property with Expert TPO Roof Installation
The article highlights key challenges in TPO roof installation including surface preparation, insulation accuracy, membrane placement, and precise seam sealing. These critical steps prevent leaks and ensure your roof endures Houston’s demanding weather. Avoid costly future repairs by addressing hidden moisture, uneven insulation, or weak welds now with proven professional techniques. Your goal is a durable, energy-efficient, watertight roof system that protects your home or business long term.
At Mister ReRoof, we understand these challenges firsthand. Our experienced team specializes in commercial and residential TPO roofing designed specifically for Houston’s climate. We emphasize quality at every stage from thorough surface prep to expert seam welding and final inspection. For reliable results that stand the test of time, choose a roofing contractor that prioritizes precision and customer satisfaction.

Ready to master your TPO roofing project with trusted Houston experts? Contact Mister ReRoof today for a free estimate. Learn more about our comprehensive roof replacement services and discover how professional installation safeguards your investment. Don’t wait until problems arise. Let us help you build a strong, storm-resistant roof crafted for lasting peace of mind.
Frequently Asked Questions
What are the key steps in the TPO roof installation process?
Successfully installing a TPO roof involves five key steps: preparing the roof surface, installing insulation and vapor barriers, positioning and securing the TPO membrane, sealing seams and flashings, and conducting a thorough inspection and testing. Follow these steps carefully to ensure a durable and effective roofing system.
How can I ensure proper surface preparation for TPO installation?
To ensure proper surface preparation, inspect the existing roof for damage, remove all debris, and fix any structural issues. Make sure the surface is clean, smooth, and completely dry before proceeding with the membrane installation.
What is the purpose of vapor barriers in TPO roof installation?
Vapor barriers are essential in TPO roof installation to prevent moisture intrusion and condensation issues. Install them properly by ensuring they are sealed continuously across the entire surface to maintain energy efficiency and roof performance.
How do I achieve watertight seals for TPO seams and flashings?
To achieve watertight seals, use hot air welding techniques to fuse membrane seams thoroughly, ensuring no gaps are present. Focus on cleaning membrane edges and maintaining consistent temperatures during the welding process for optimal results.
What should I inspect during the final quality assurance of my TPO roof?
During the final inspection, check seam welds for consistency, use electronic leak detection to identify weaknesses, and verify that all installation guidelines were followed accurately. Document your findings to support future maintenance and warranty claims.
How can I prevent future leaks in my TPO roof installation?
To prevent future leaks, ensure all surfaces are thoroughly prepared, seams are sealed correctly, and vapor barriers are installed without gaps. Regular inspections and prompt repairs of any detected issues can significantly reduce the risk of leaks.
